
An thread about my process
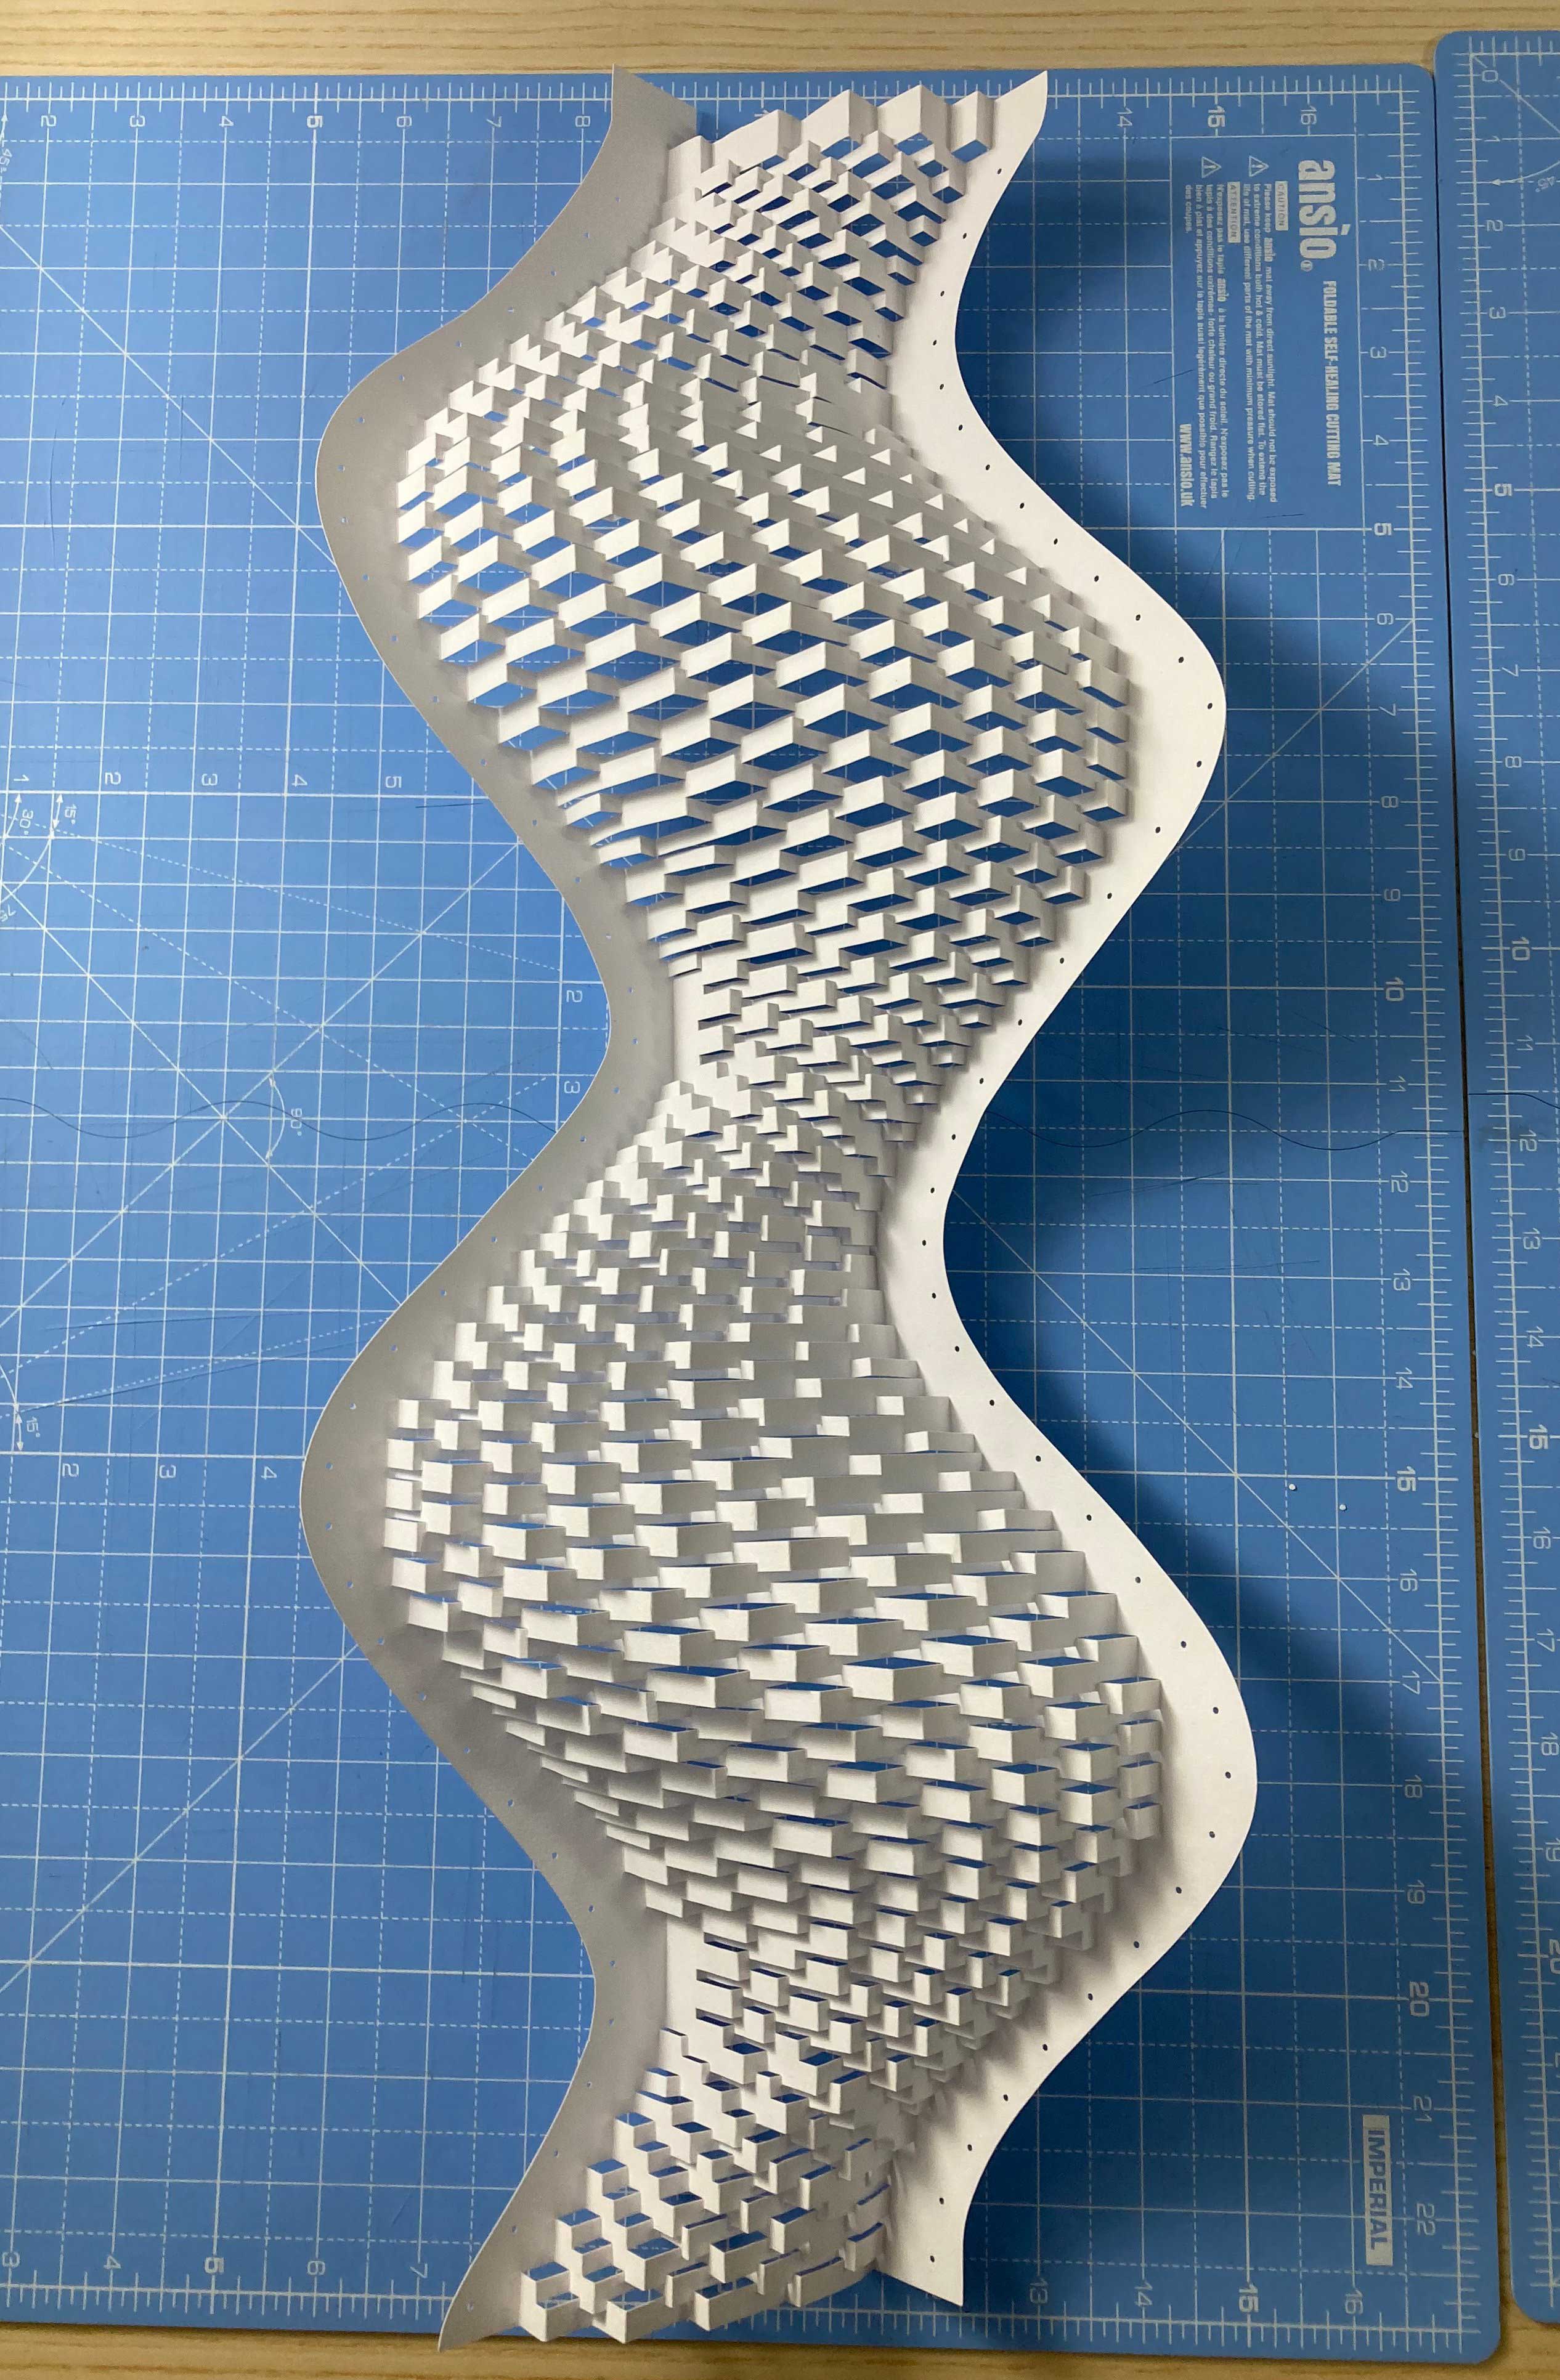
First, I cut and folded one piece of paper. It collapses flat like a pop-up, which is what I originally designed it for, but now I have other ideas for it.
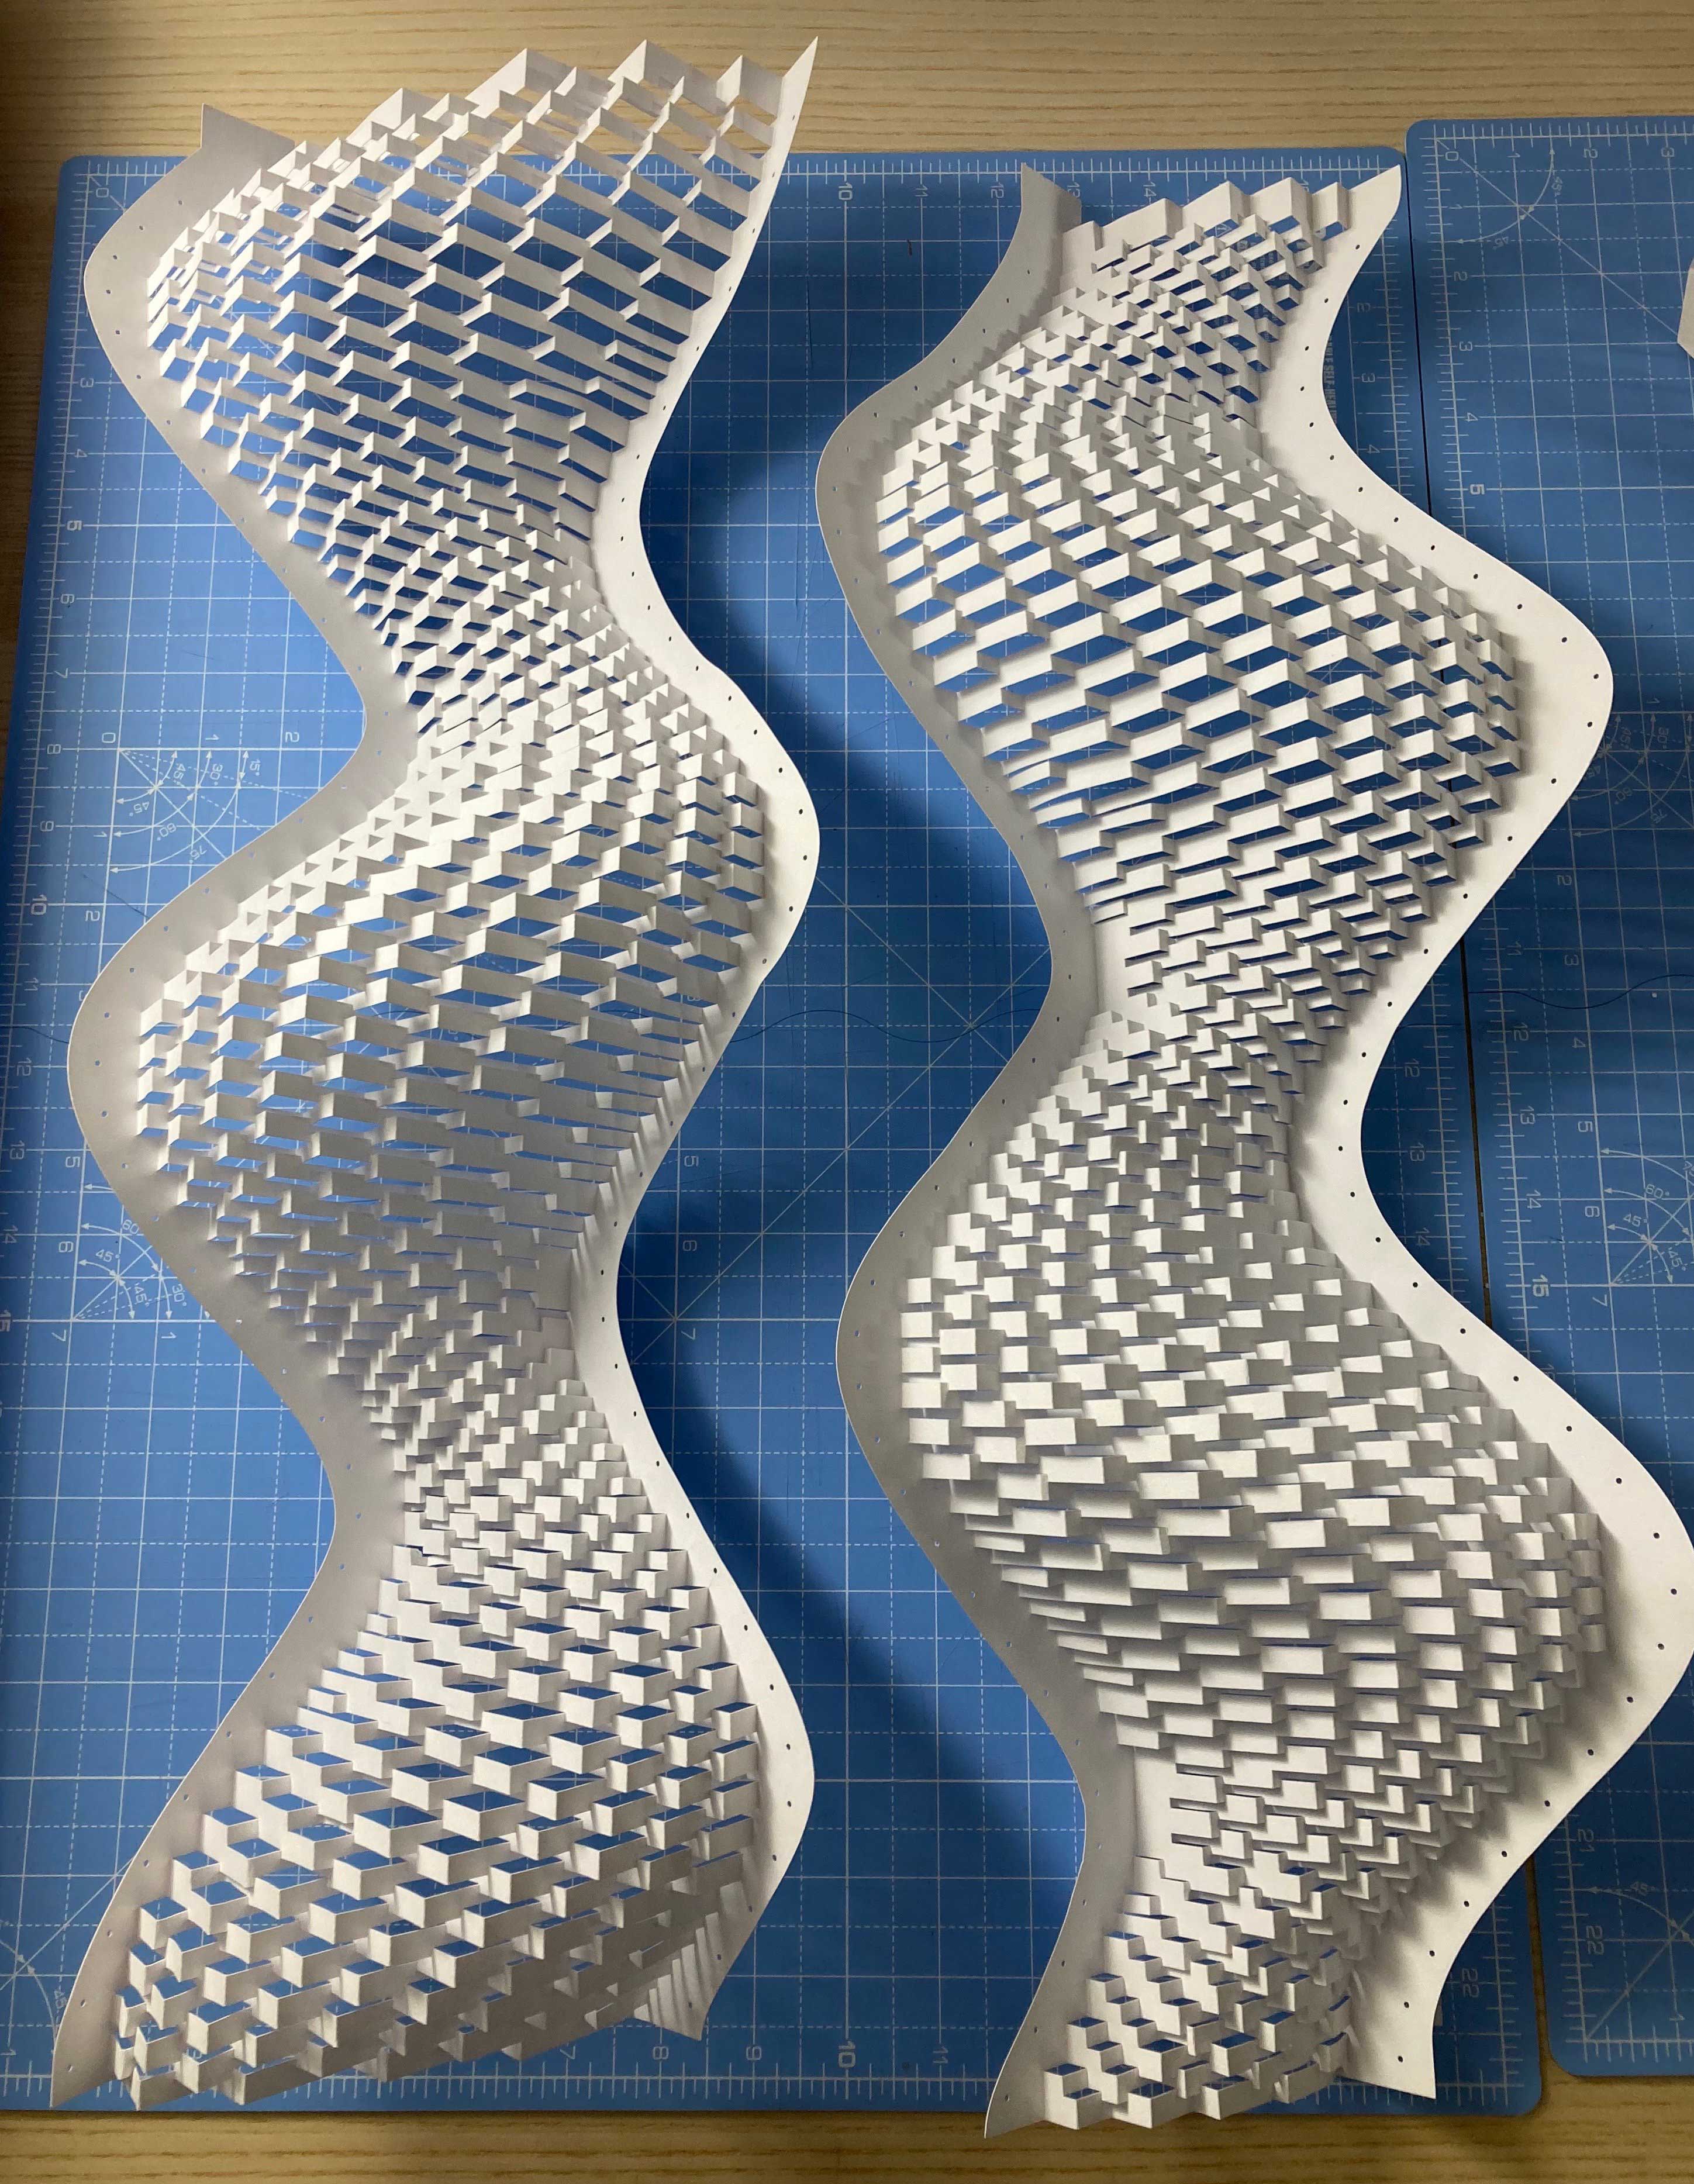
then I designed, cut, and folded a complimentary piece, so they make yin-yang pairs… here are two sheets side-by-side. they match on both edges, so as to tile infinitely together.
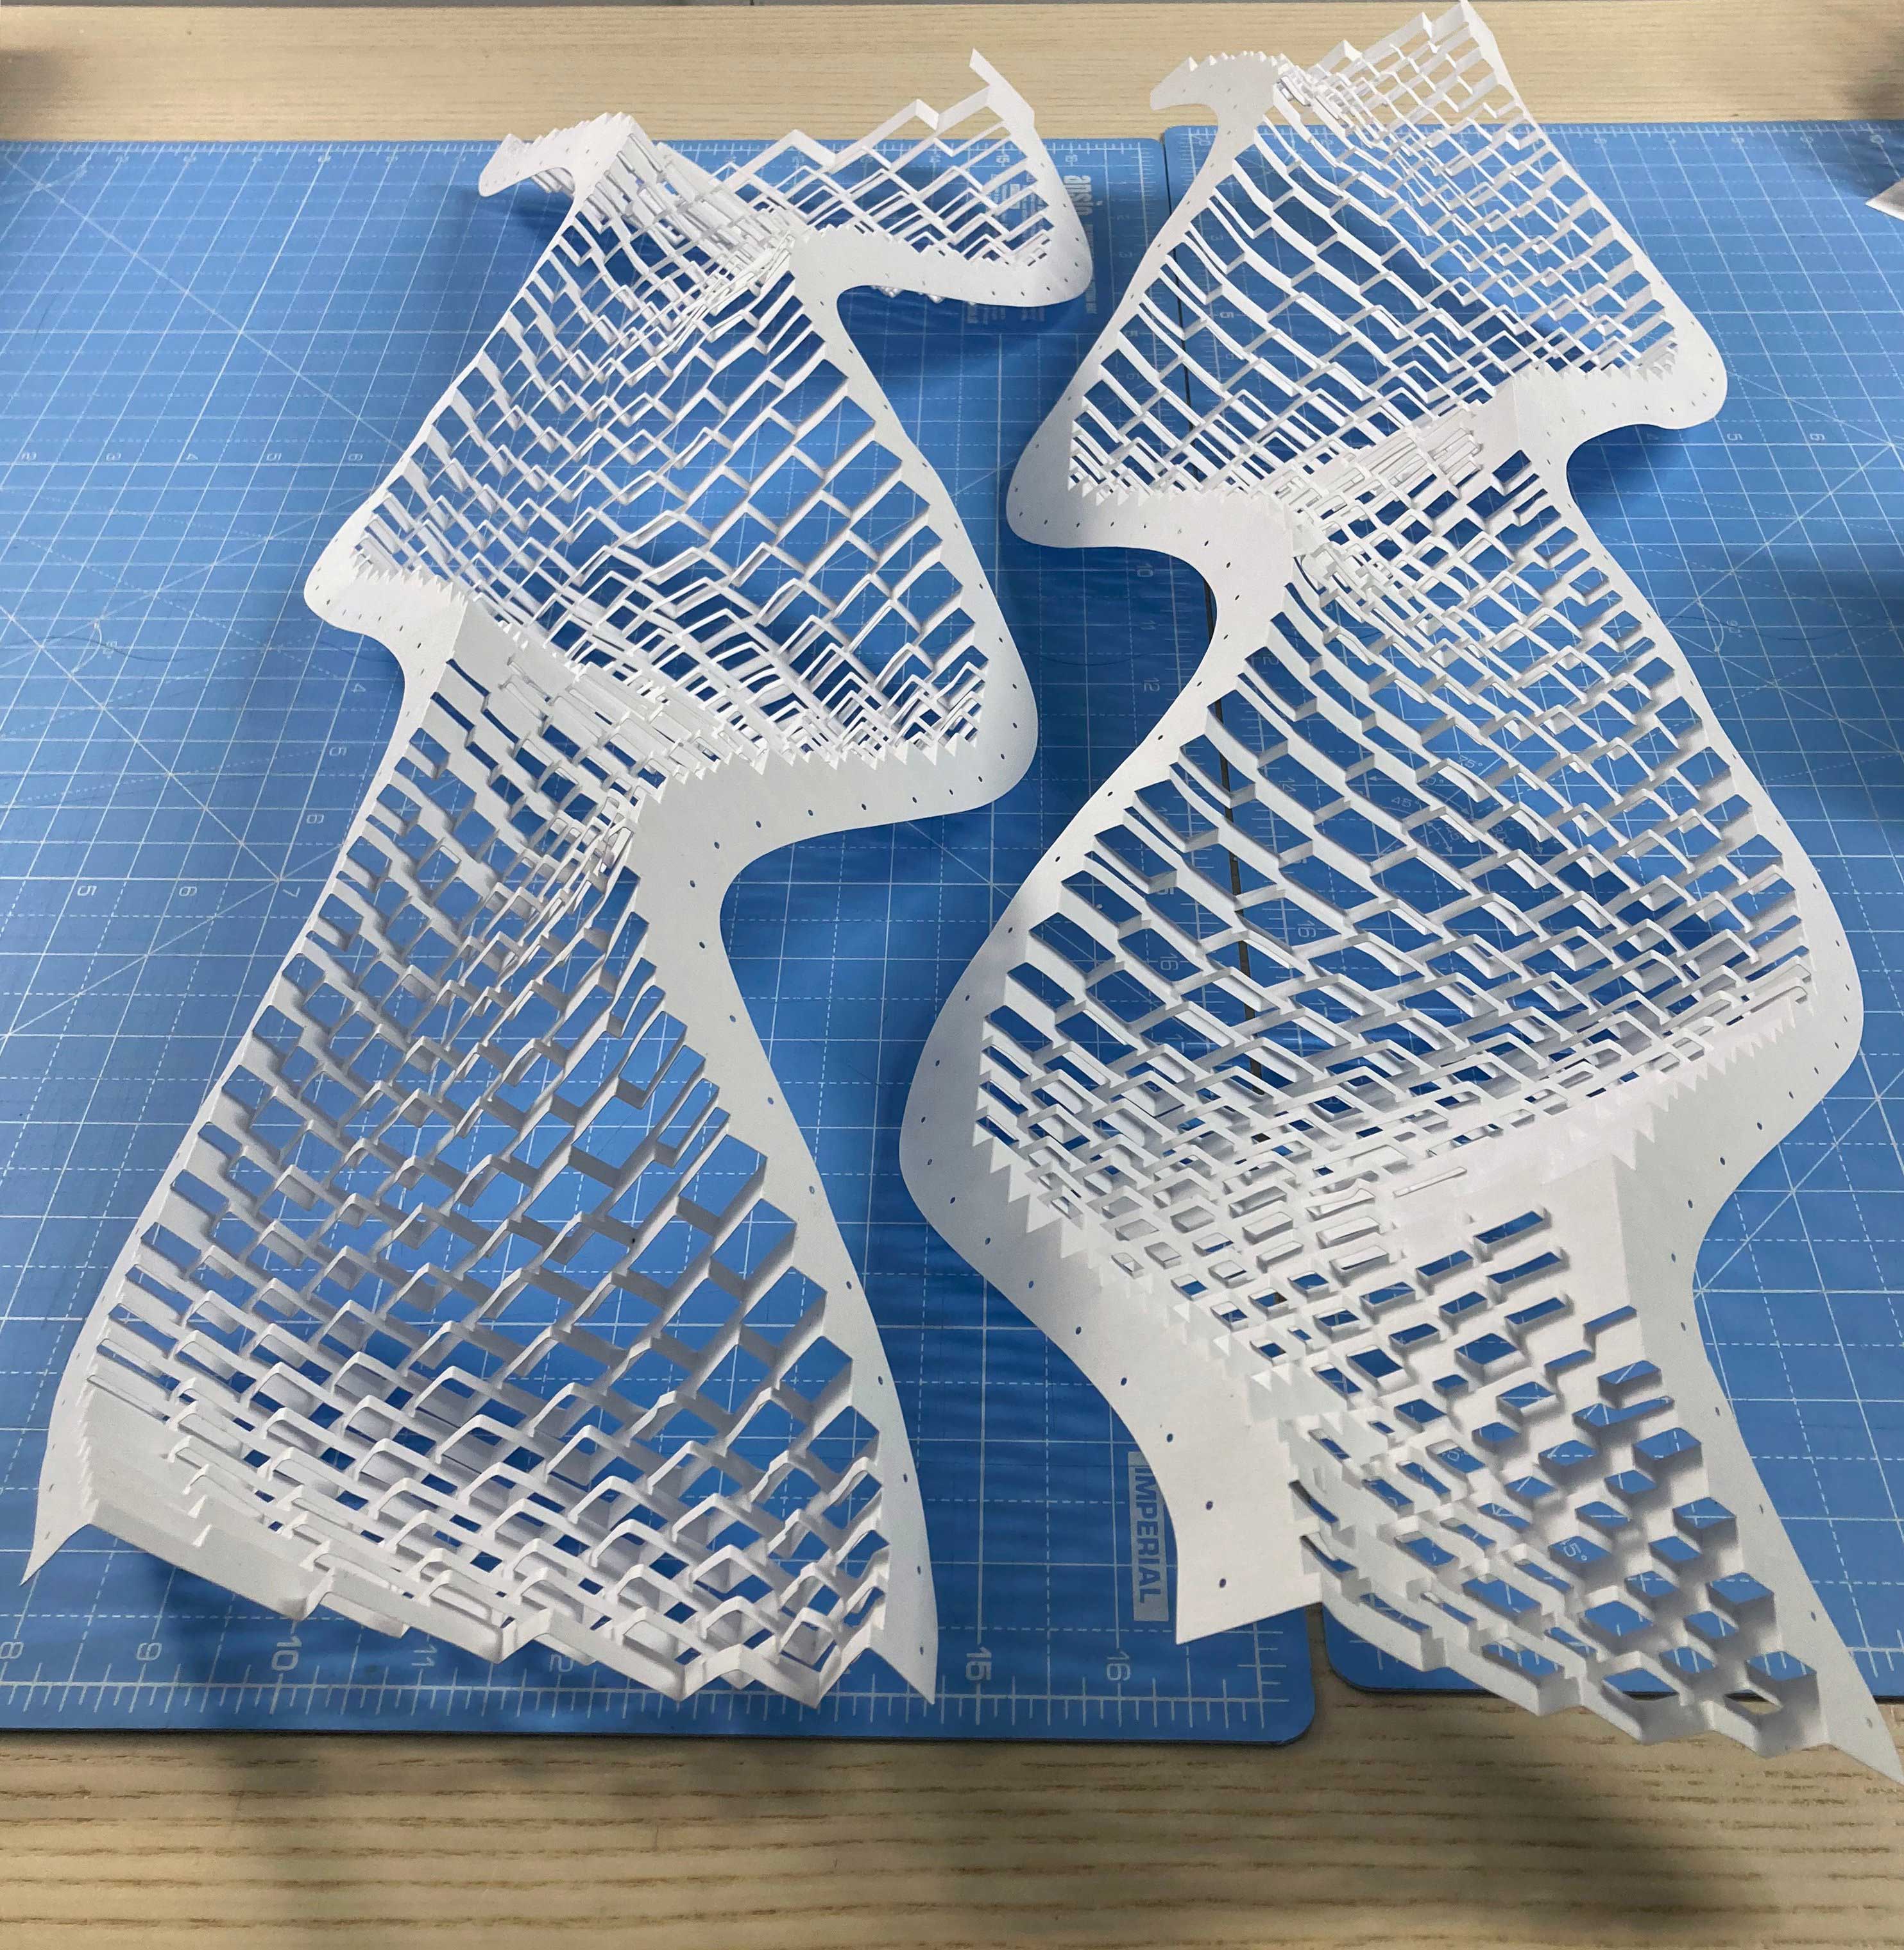
here's what they look like from the back. Paper is magical.
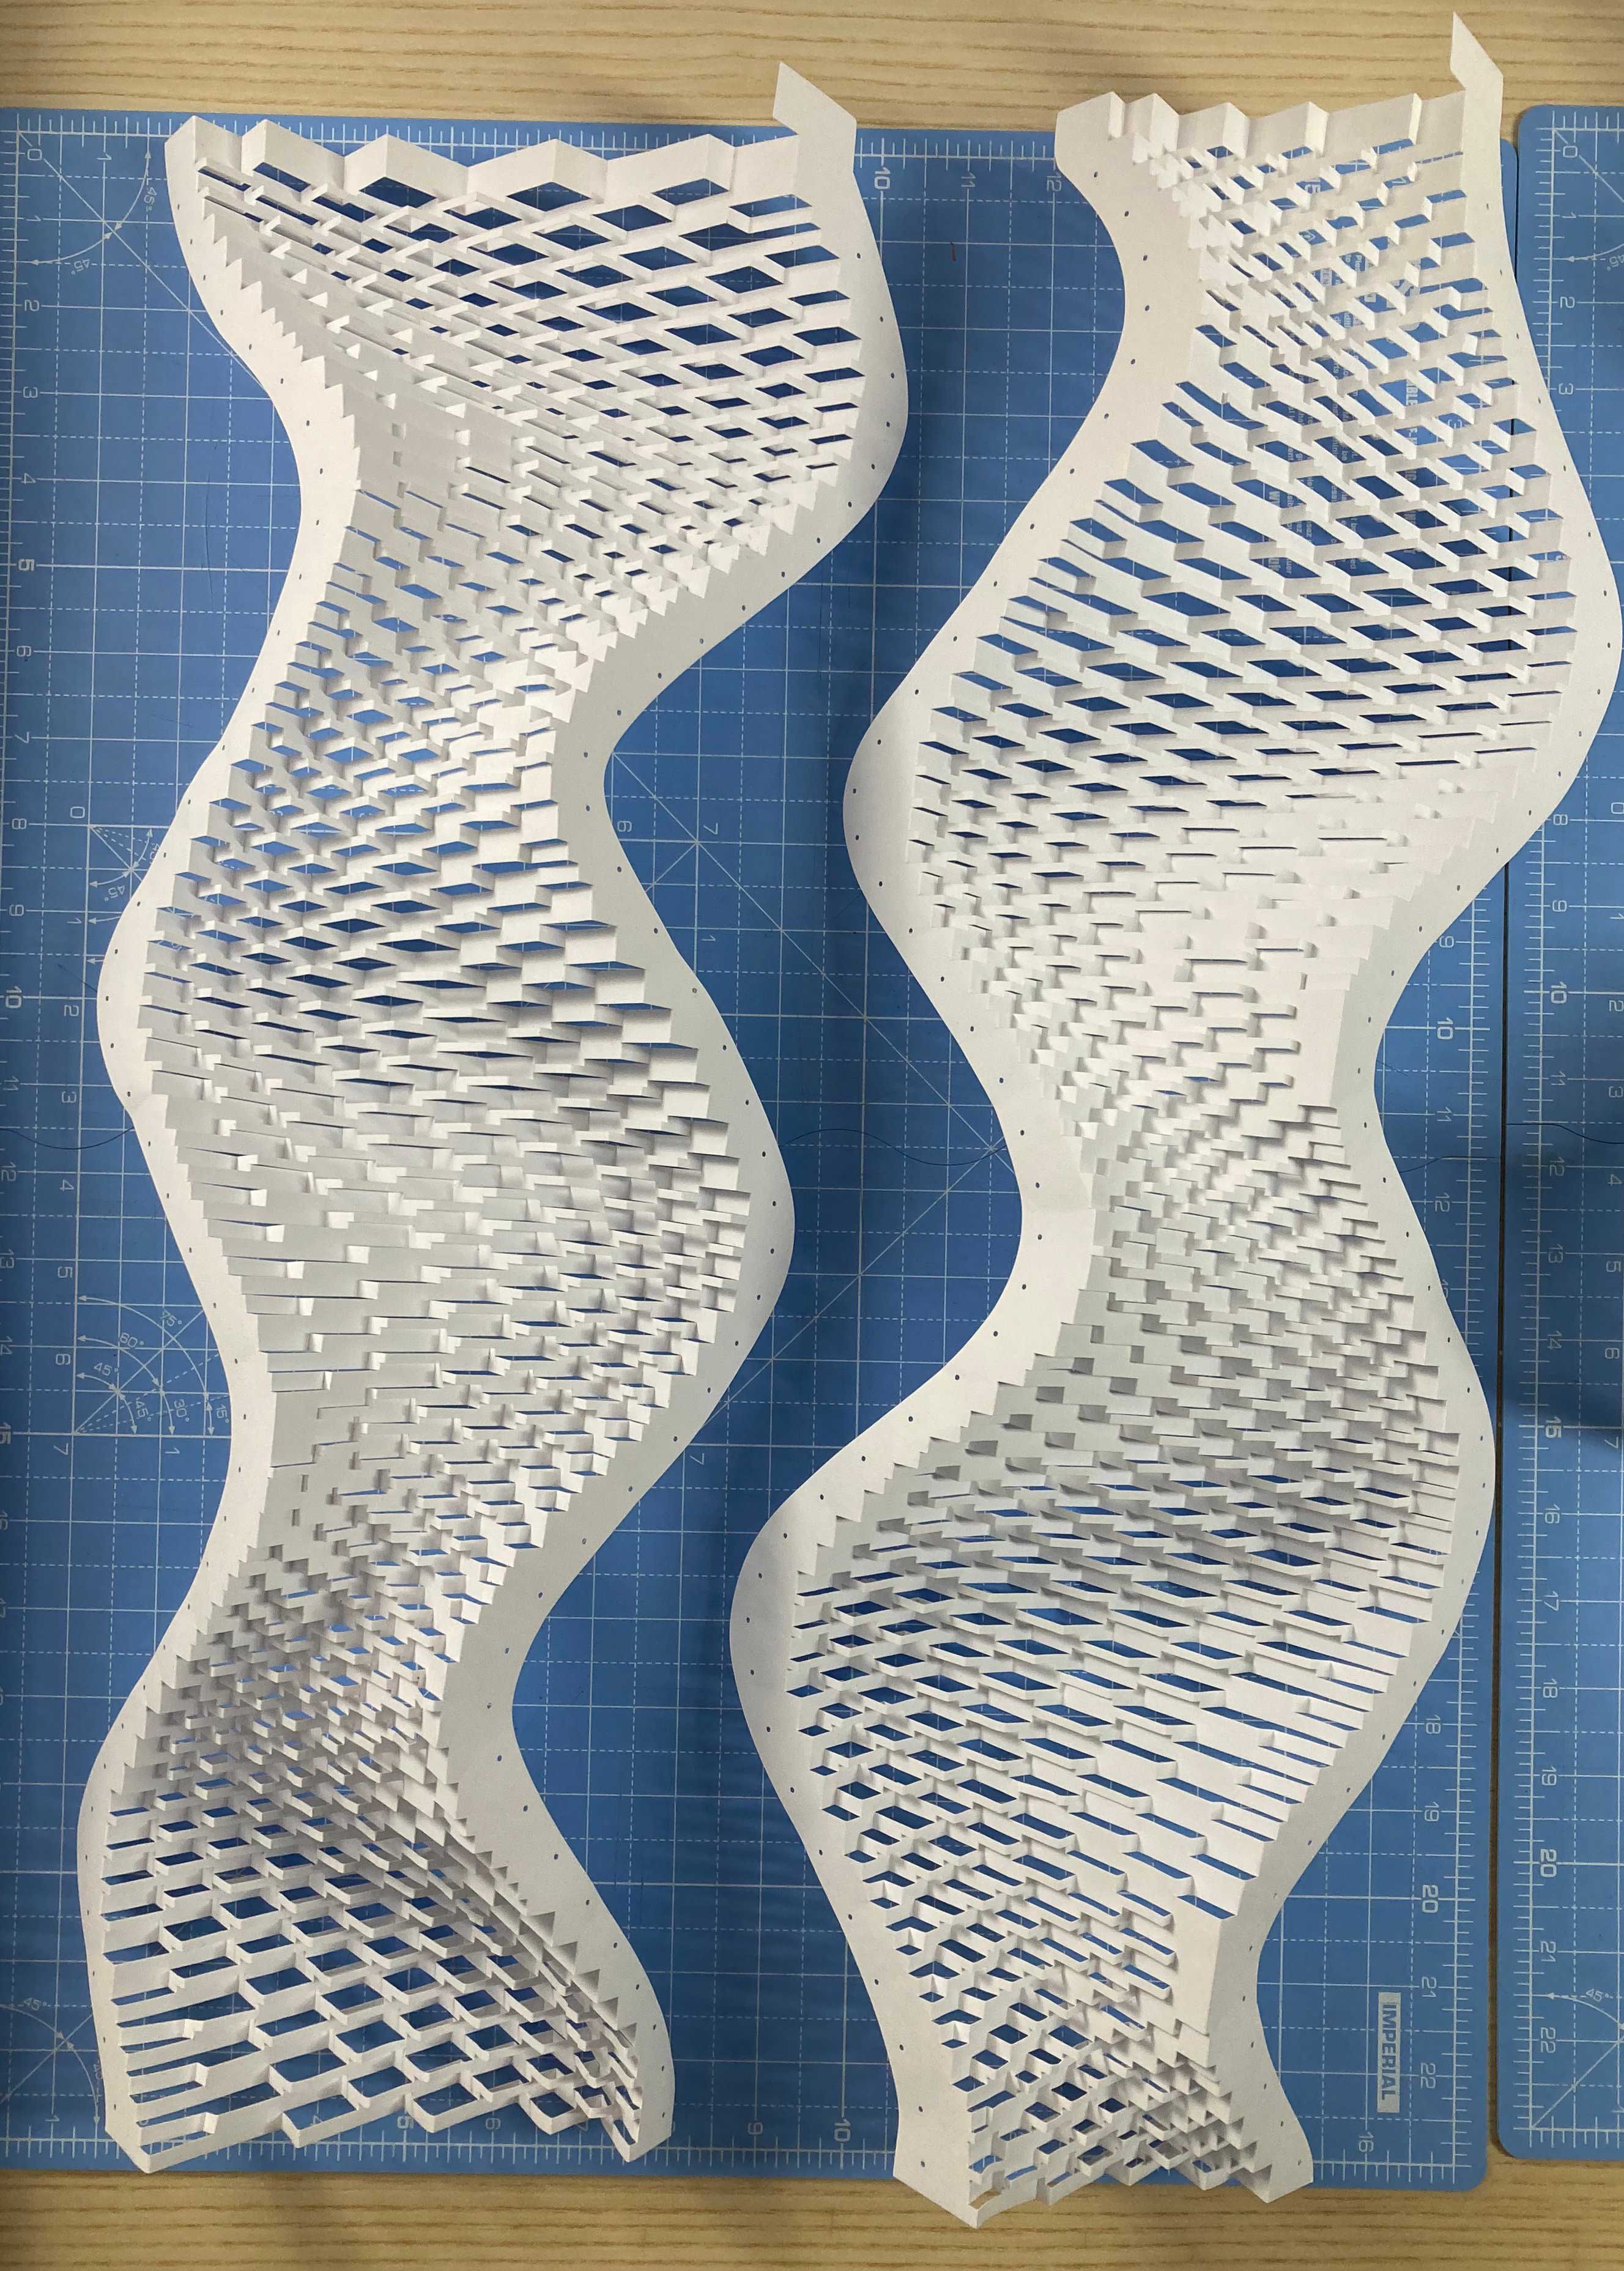
the holes along the edges help me sew them together with bookbinding thread. In theory I could cut and fold them both from a single sheet, but I don't have the facility to work with such big material at the moment. So instead, here the two pieces are sewn to make one:
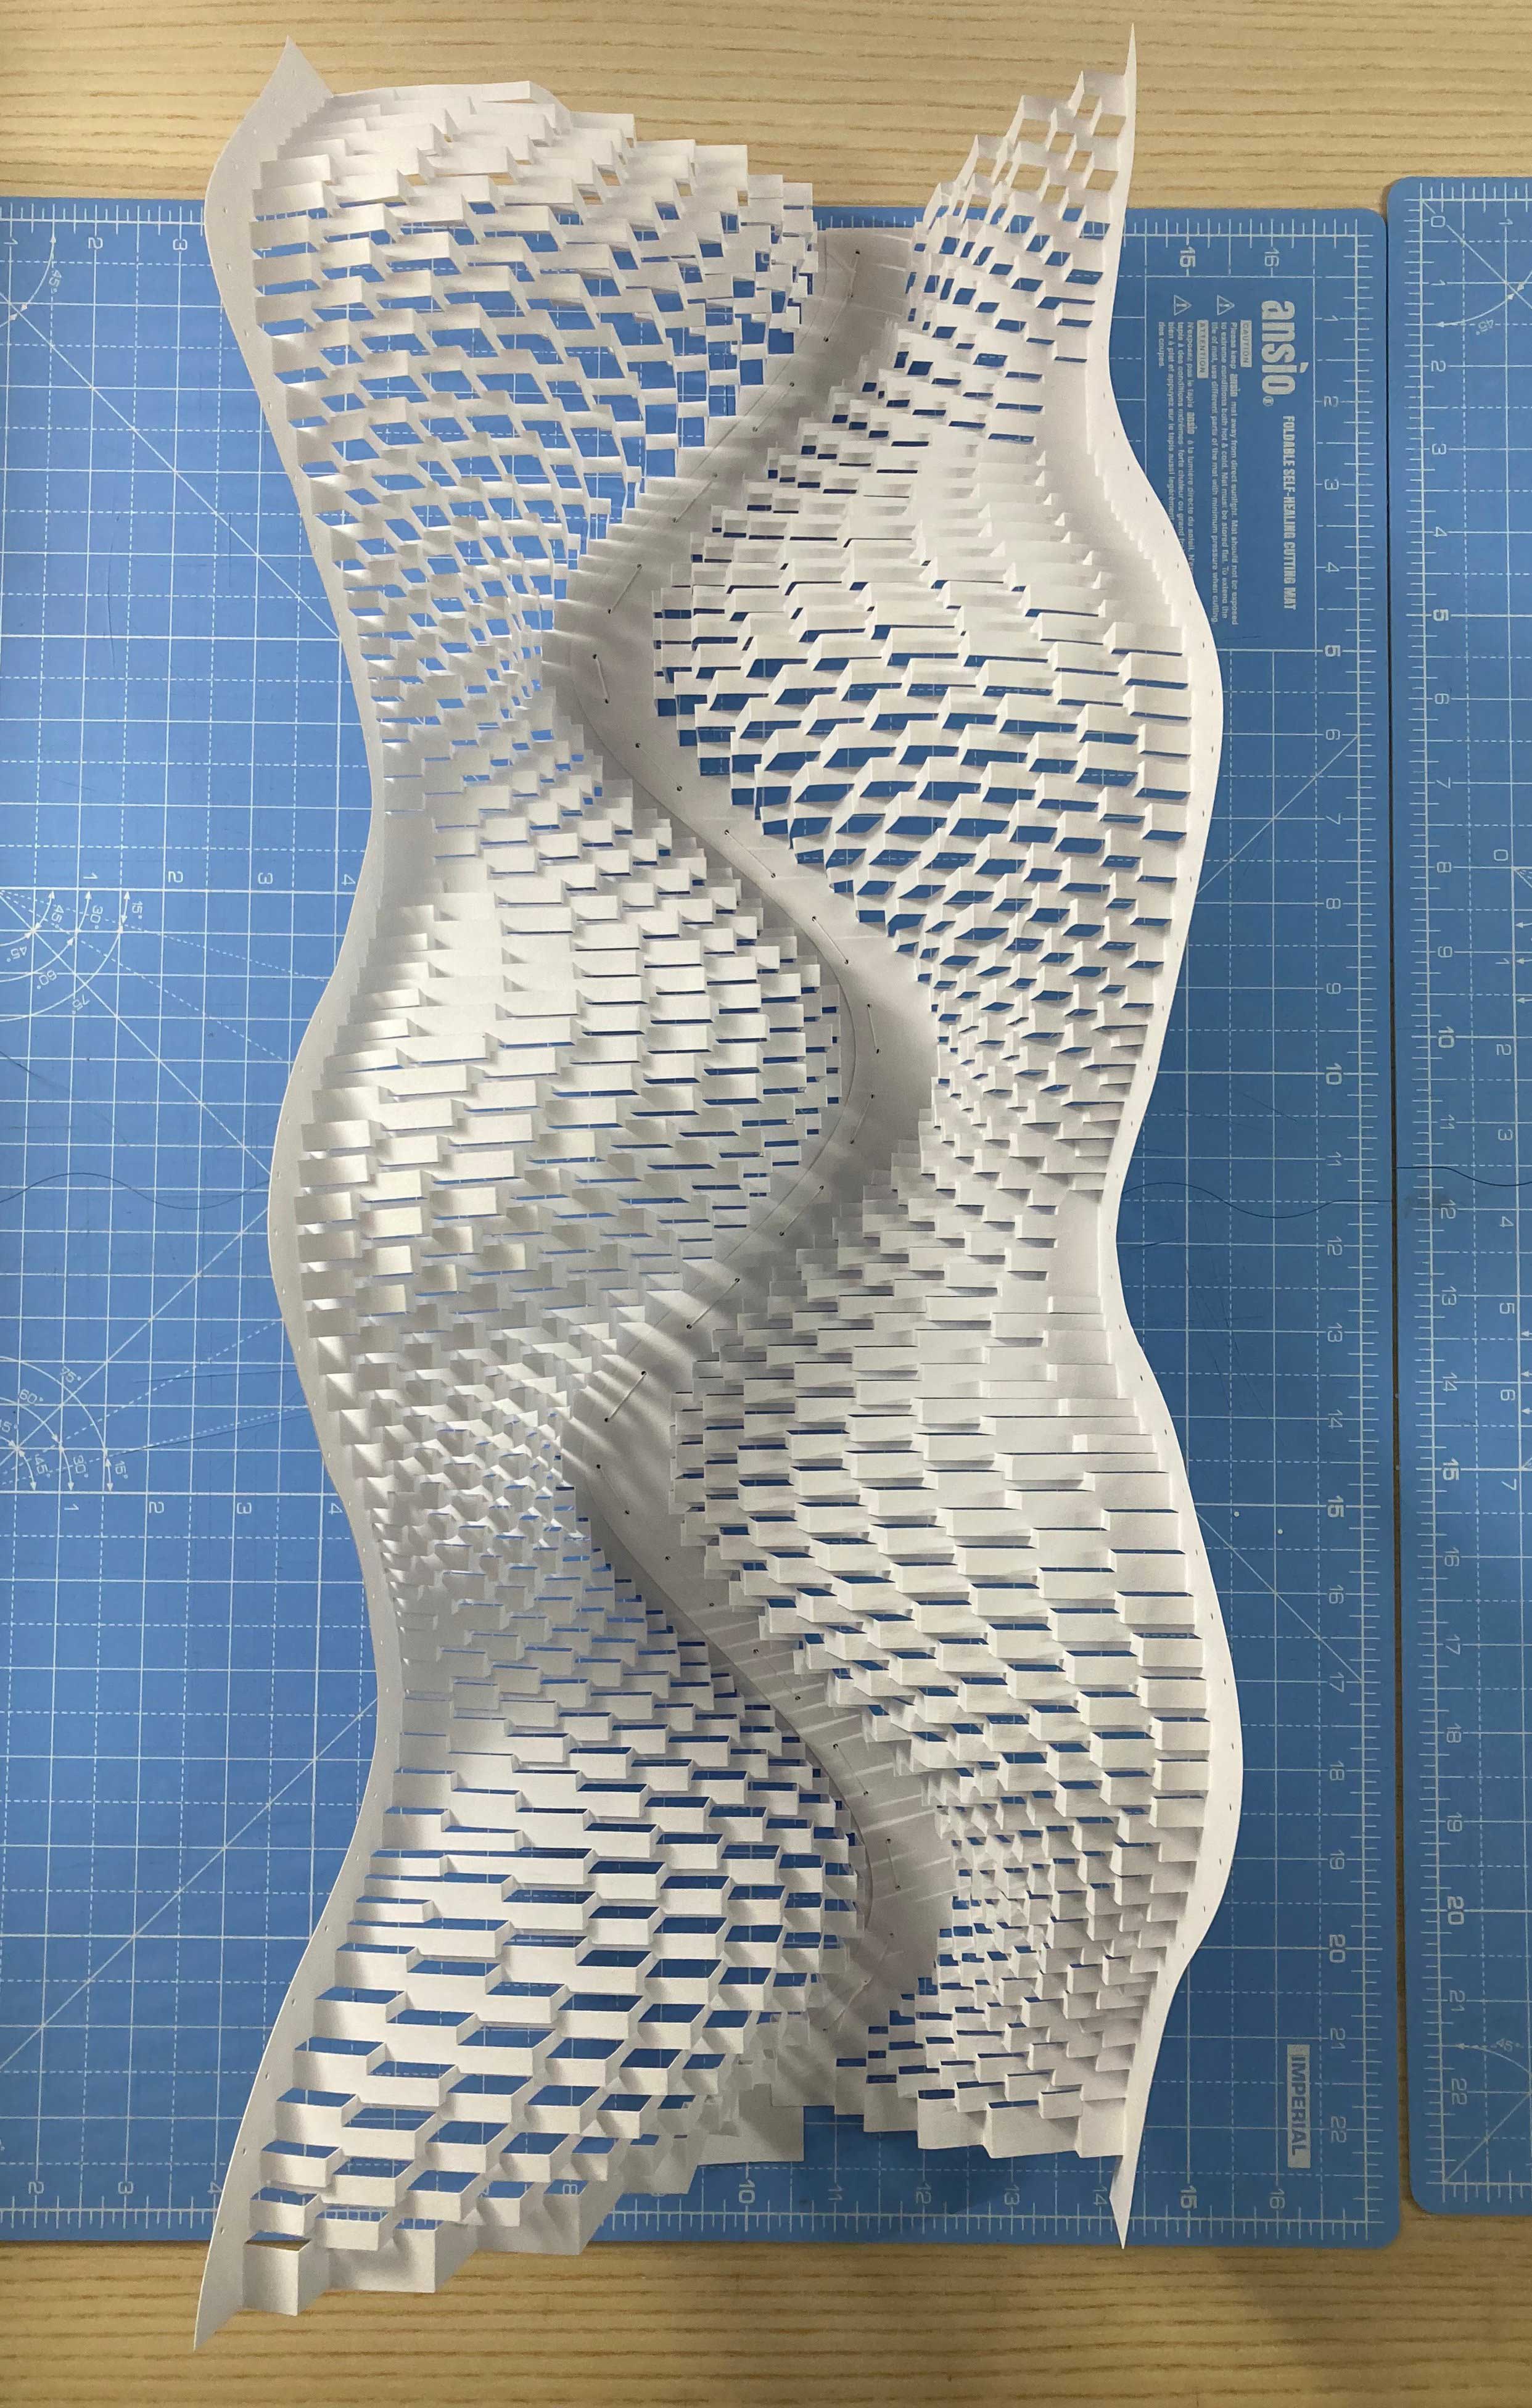
...then I added a third piece, so there are 3 sewn together now...

...and then I doubled that, so now there are 6 sheets of paper, cut, folded, and sewn together. Again this could in theory be made from a single sheet, but I'd need to start with a piece of paper 60 x 190 cm, which I don't have.
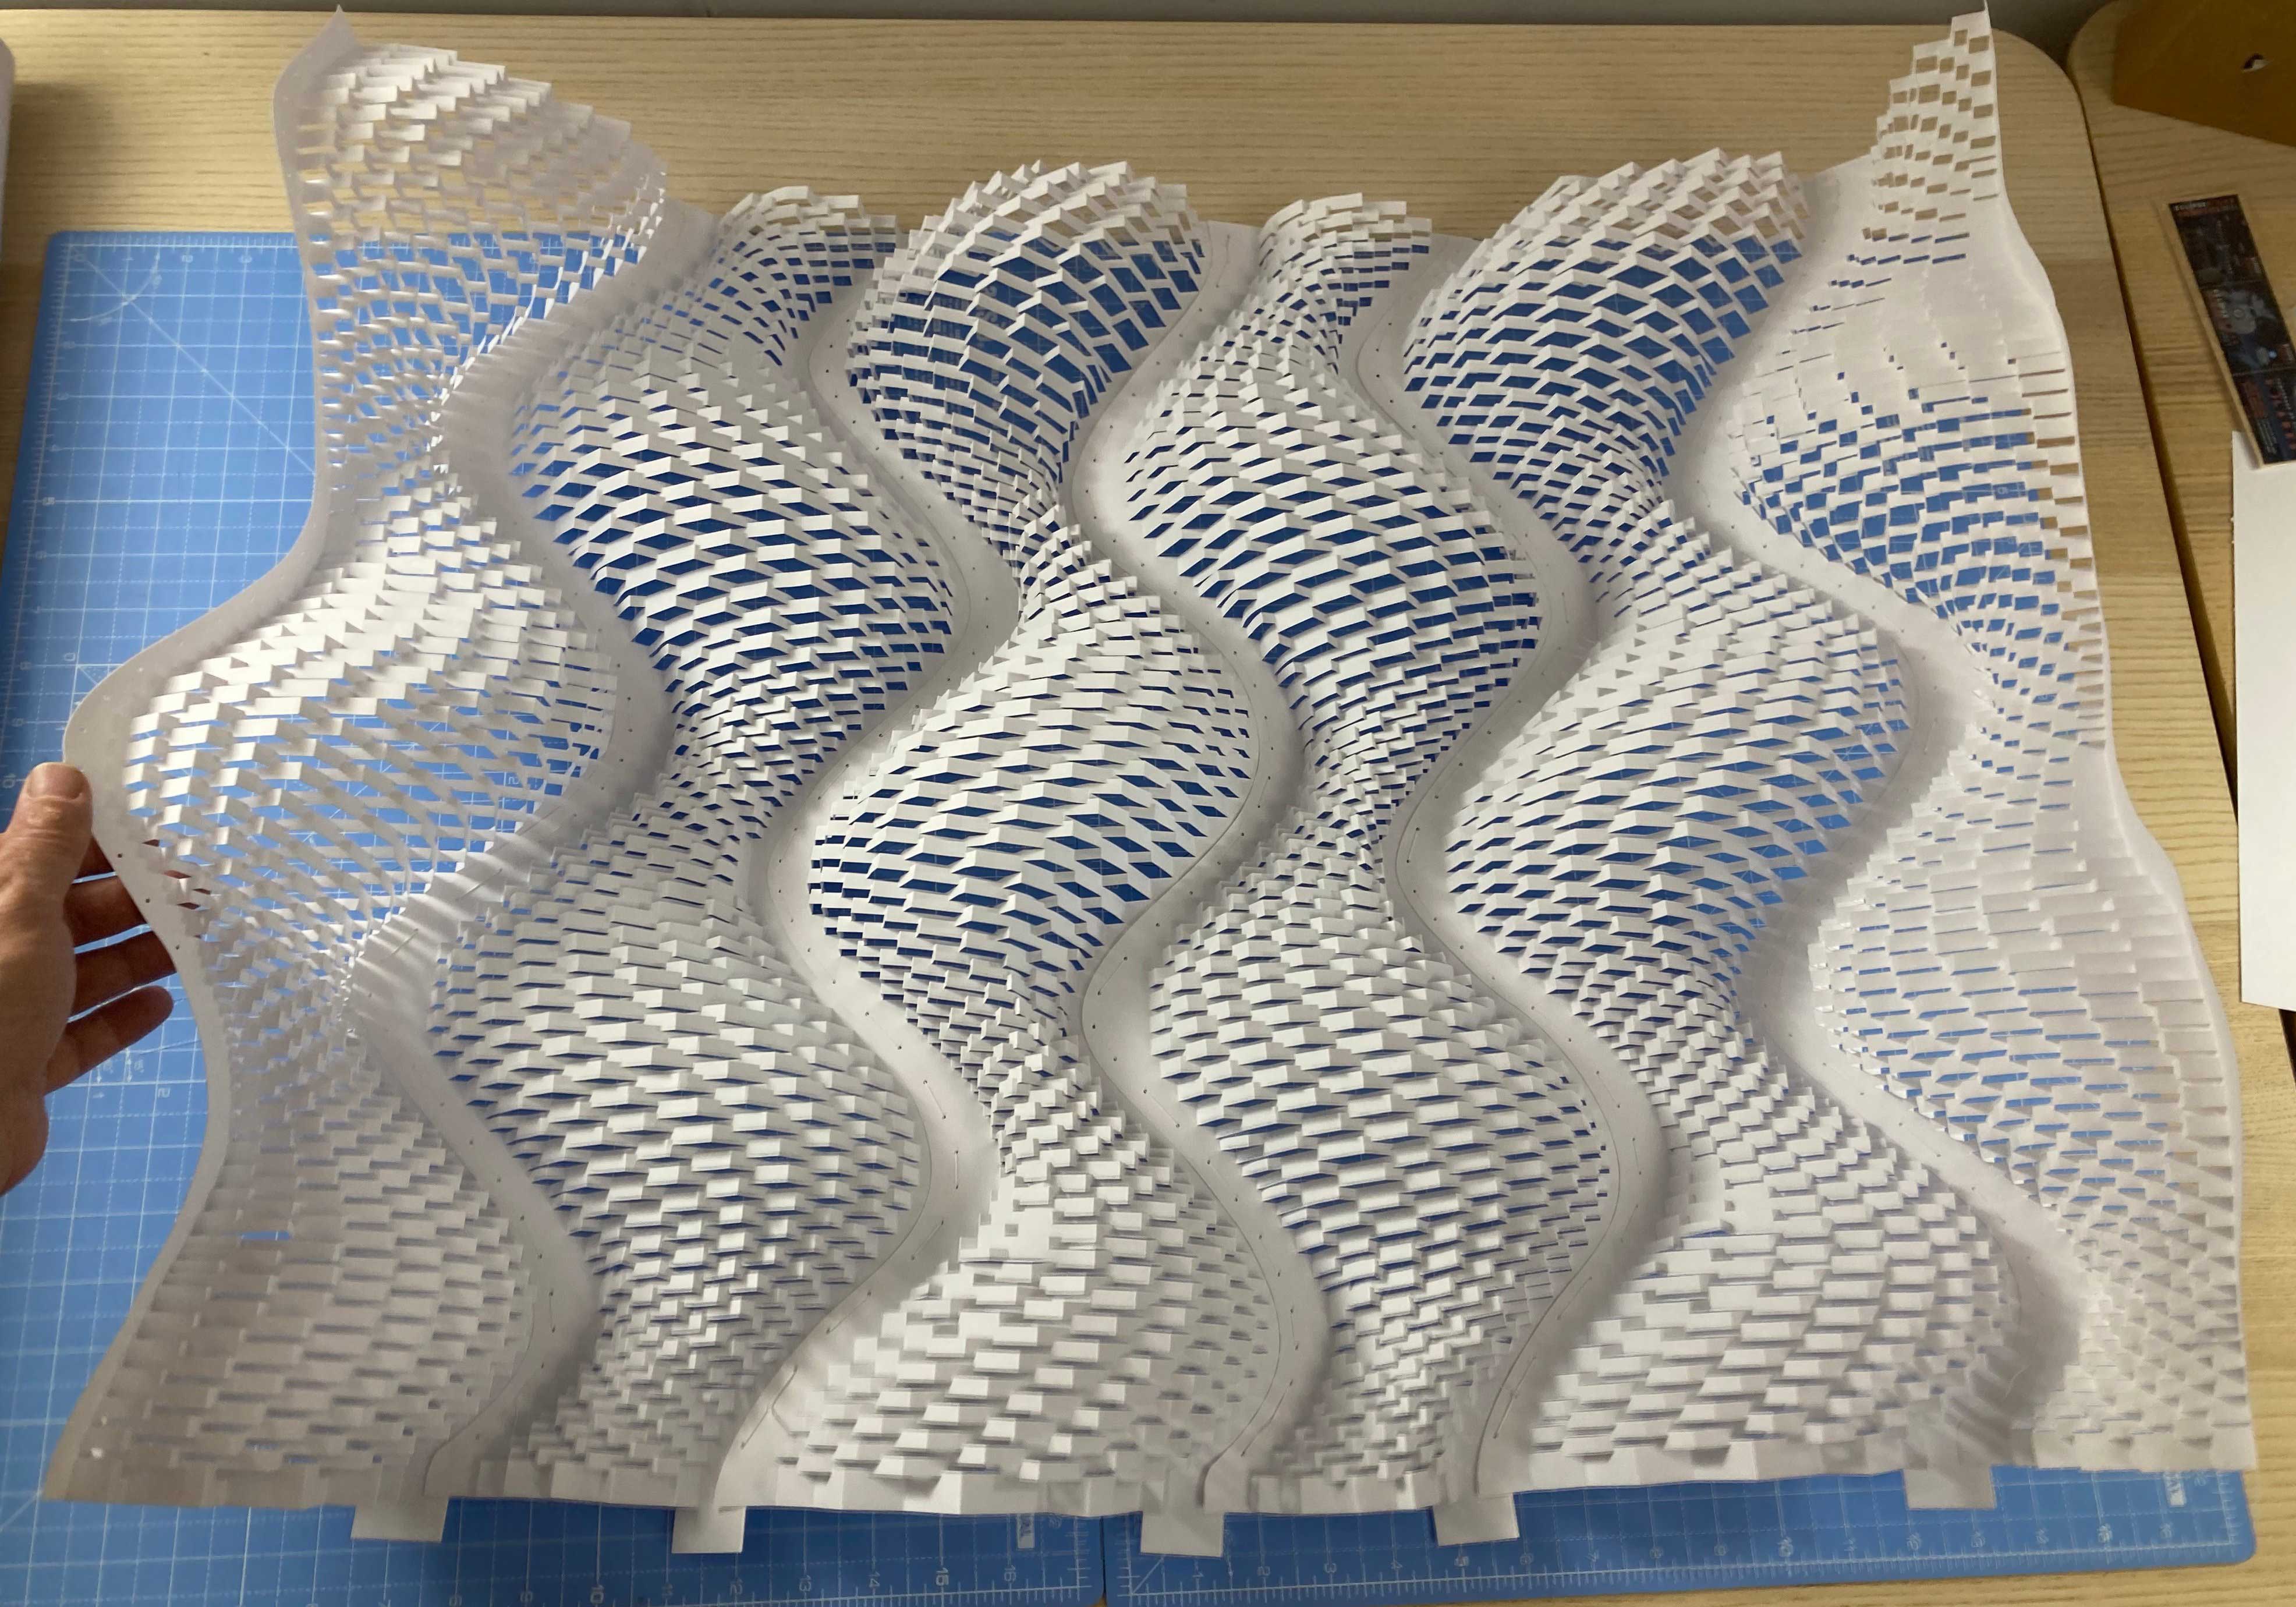
I really like this, I think it would look great mounted flat and be very bulgey and hydraulic-looking, but that's not my current goal, so I sewed the ends together, making a sort of tube.
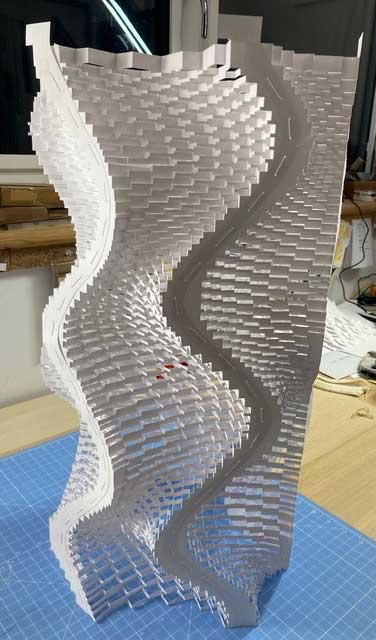
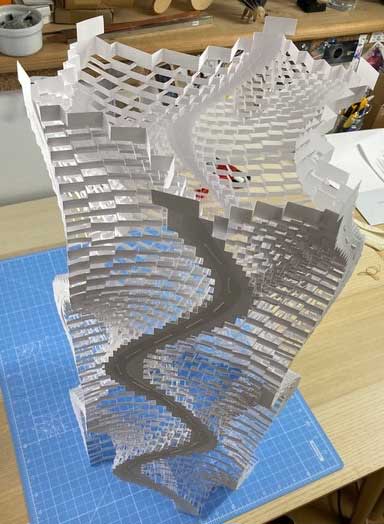
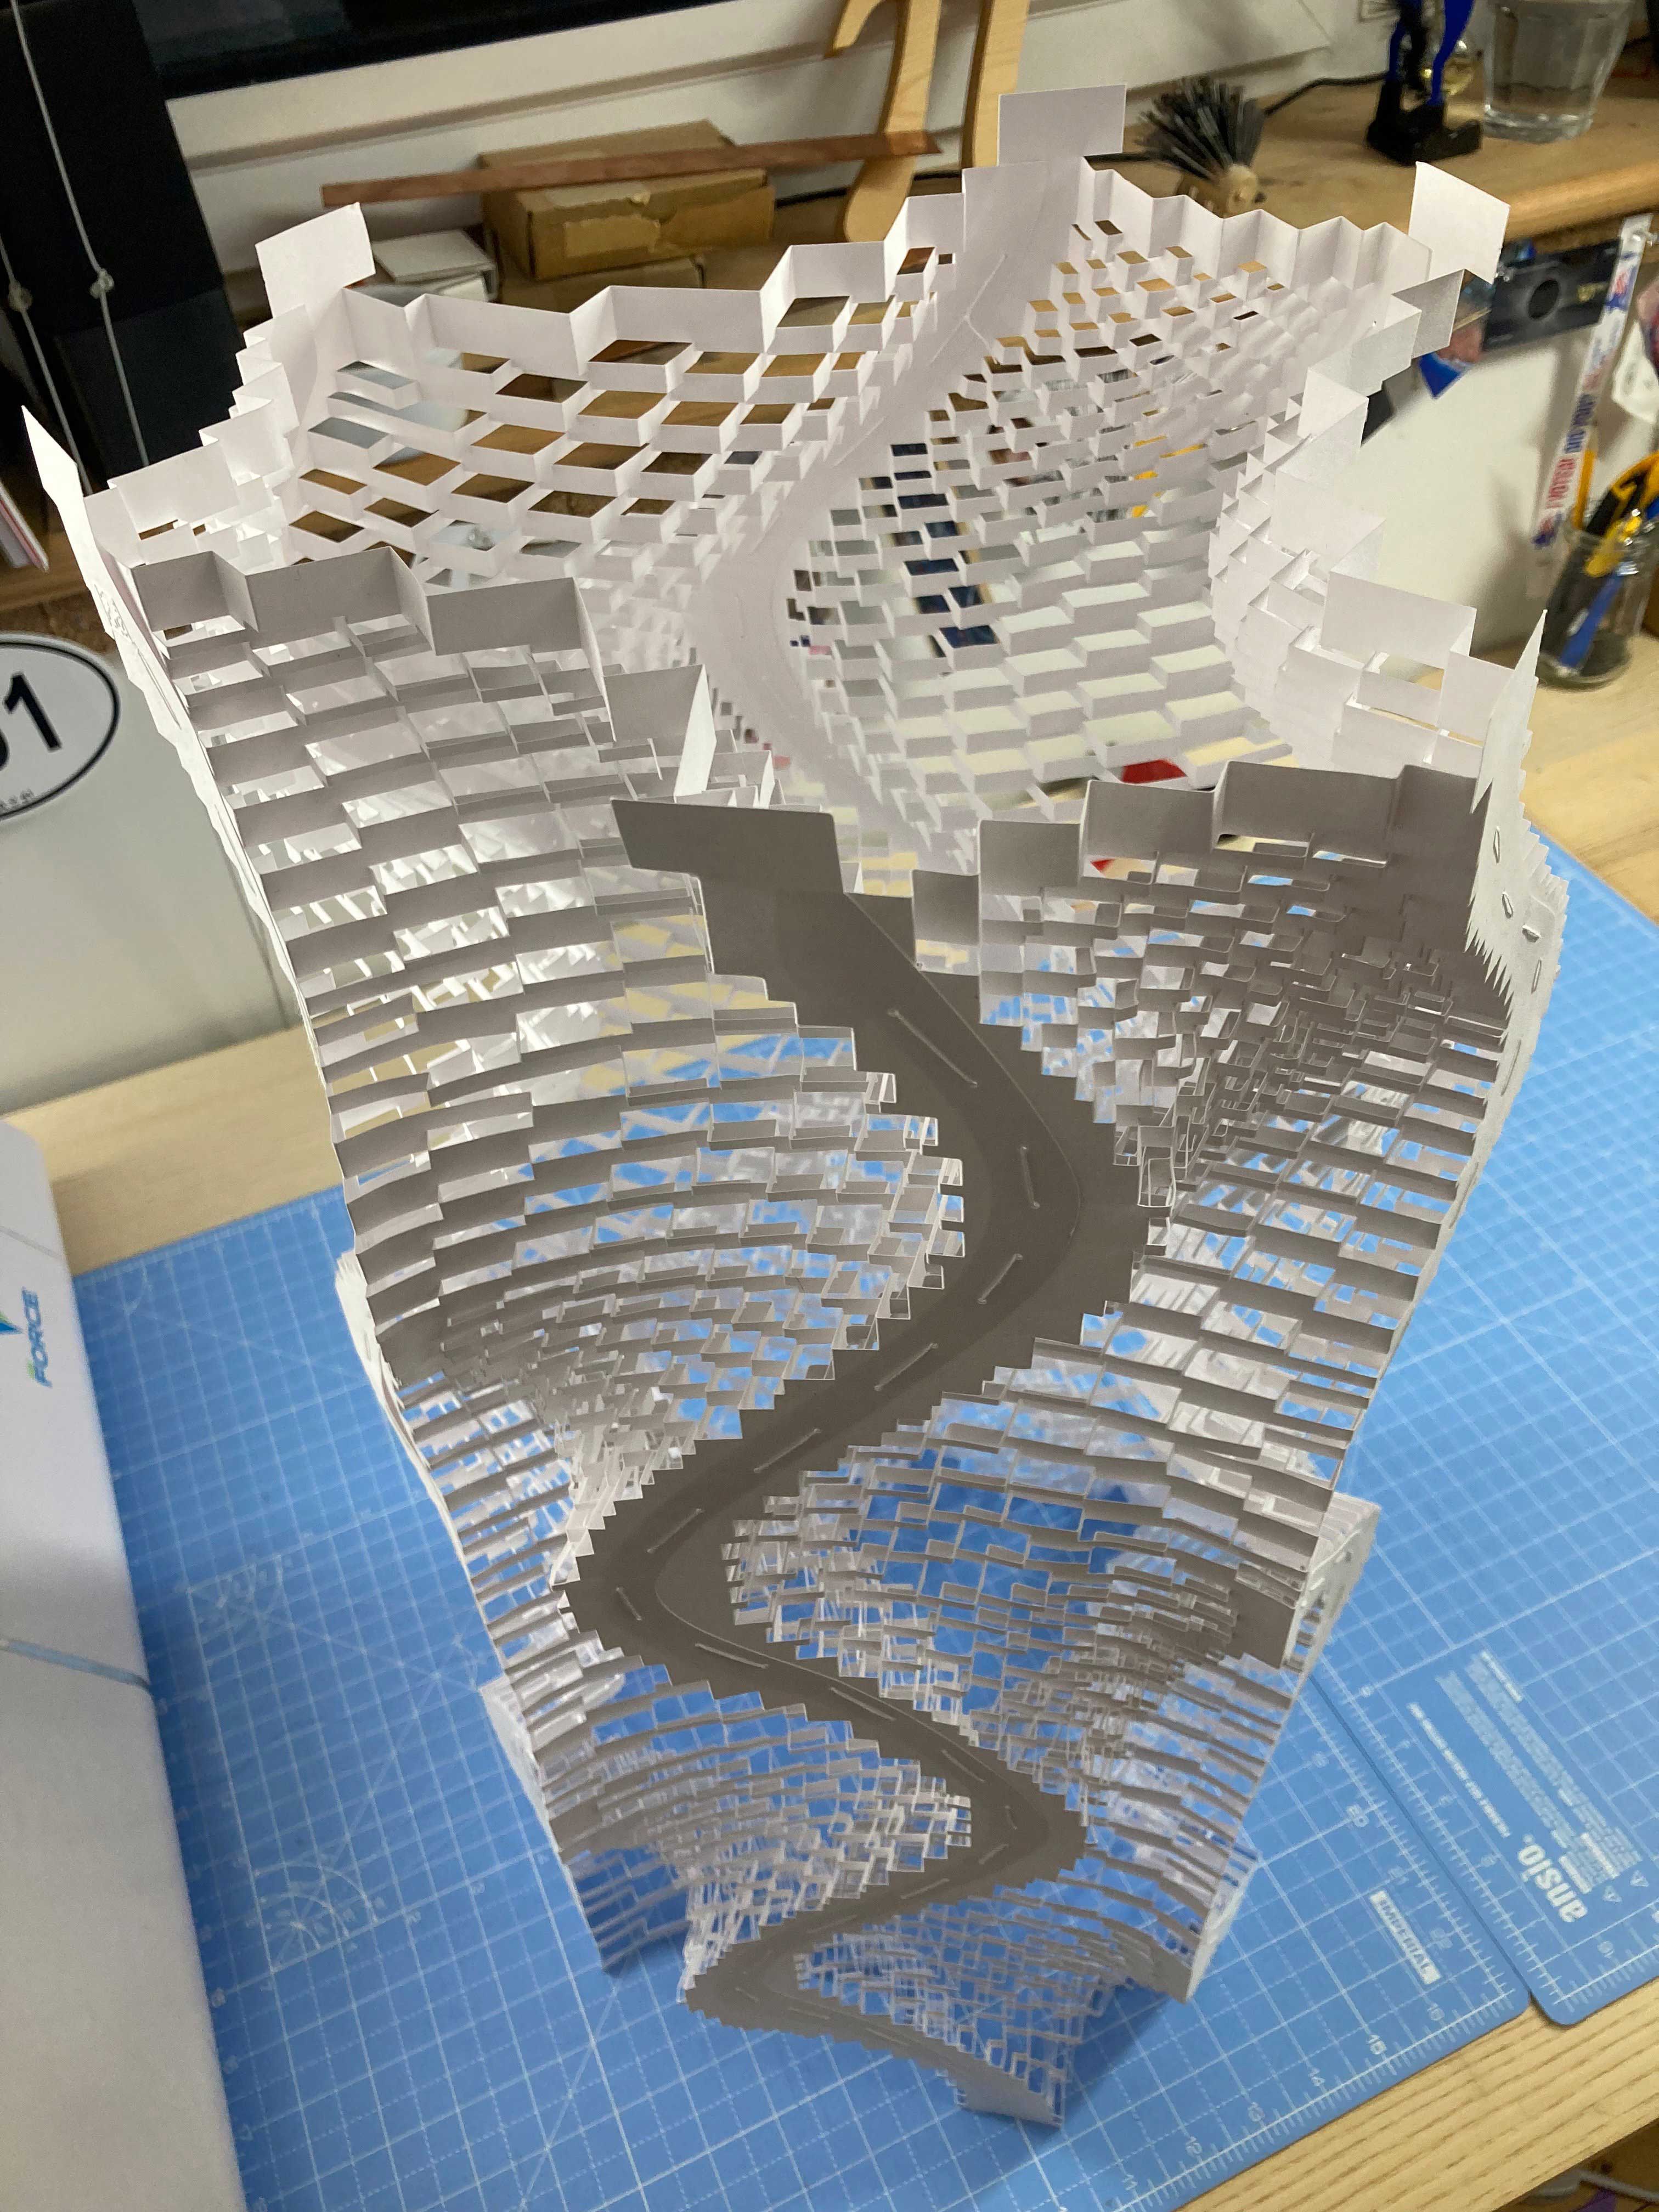
I left those little paper flags sticking out of each piece make feet I can use to anchor the whole thing into a plinth. Eventually I might make one out of wood, but for the moment a piece of honeycomb board will do.
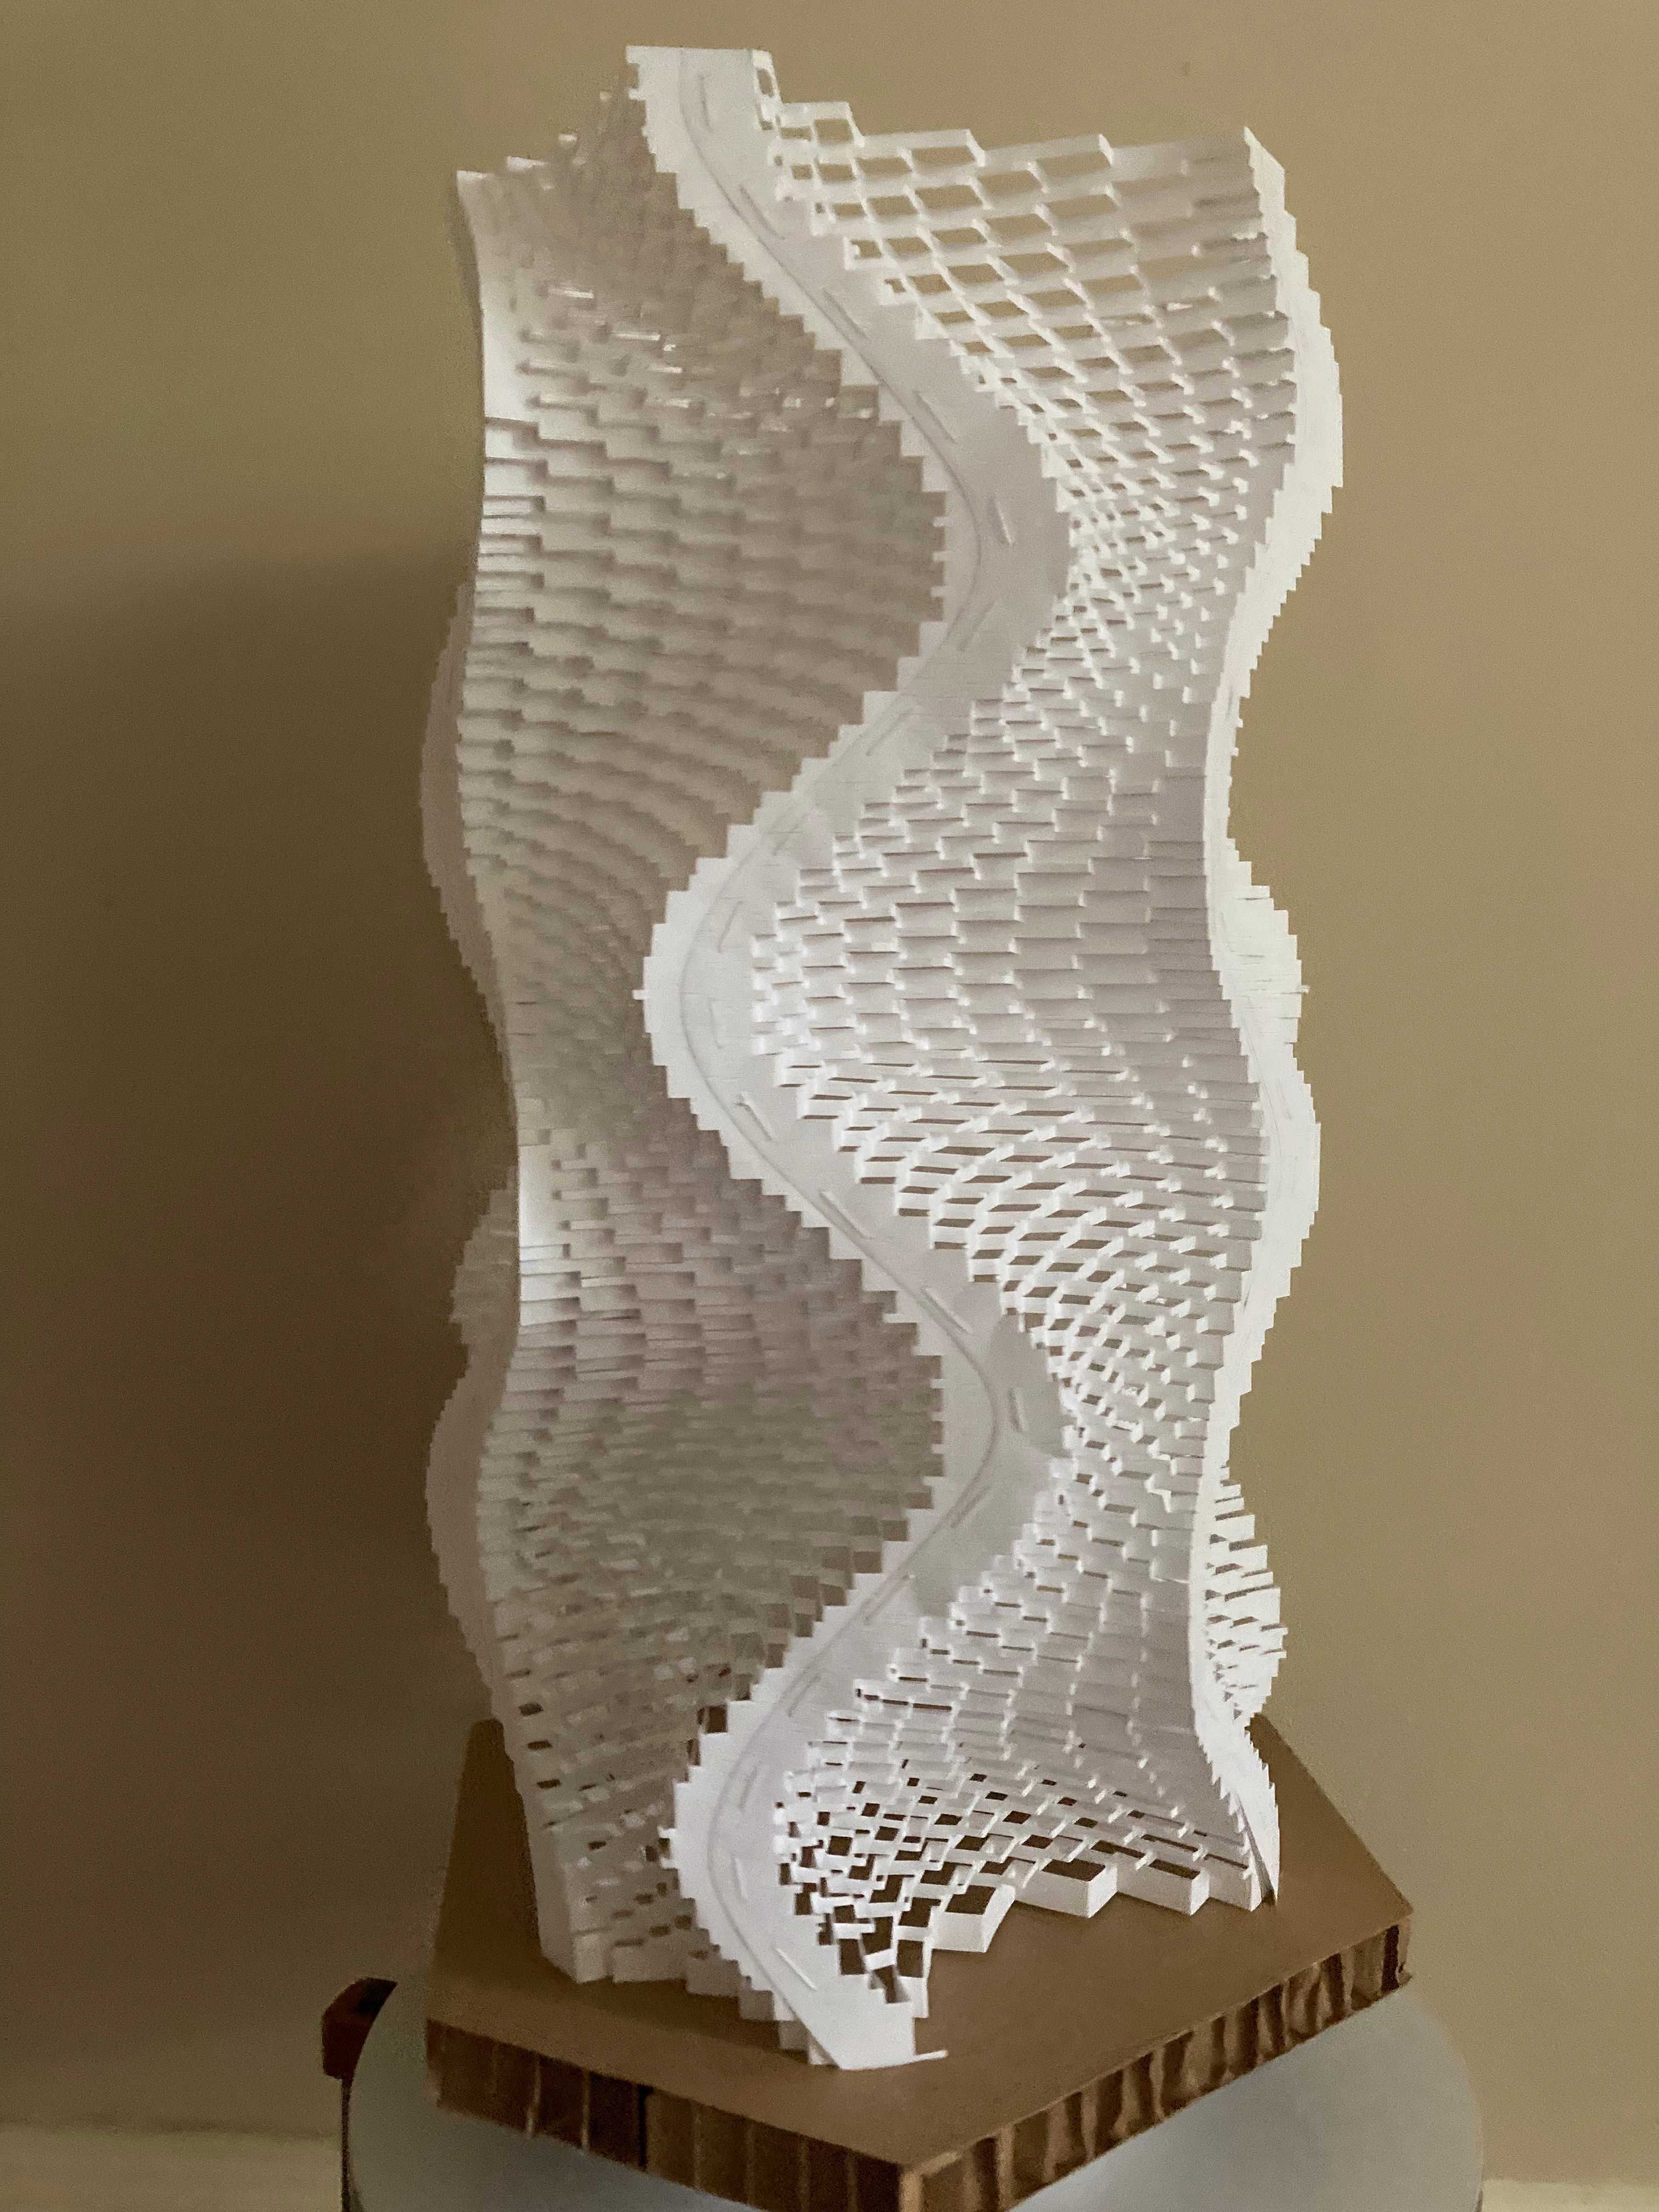
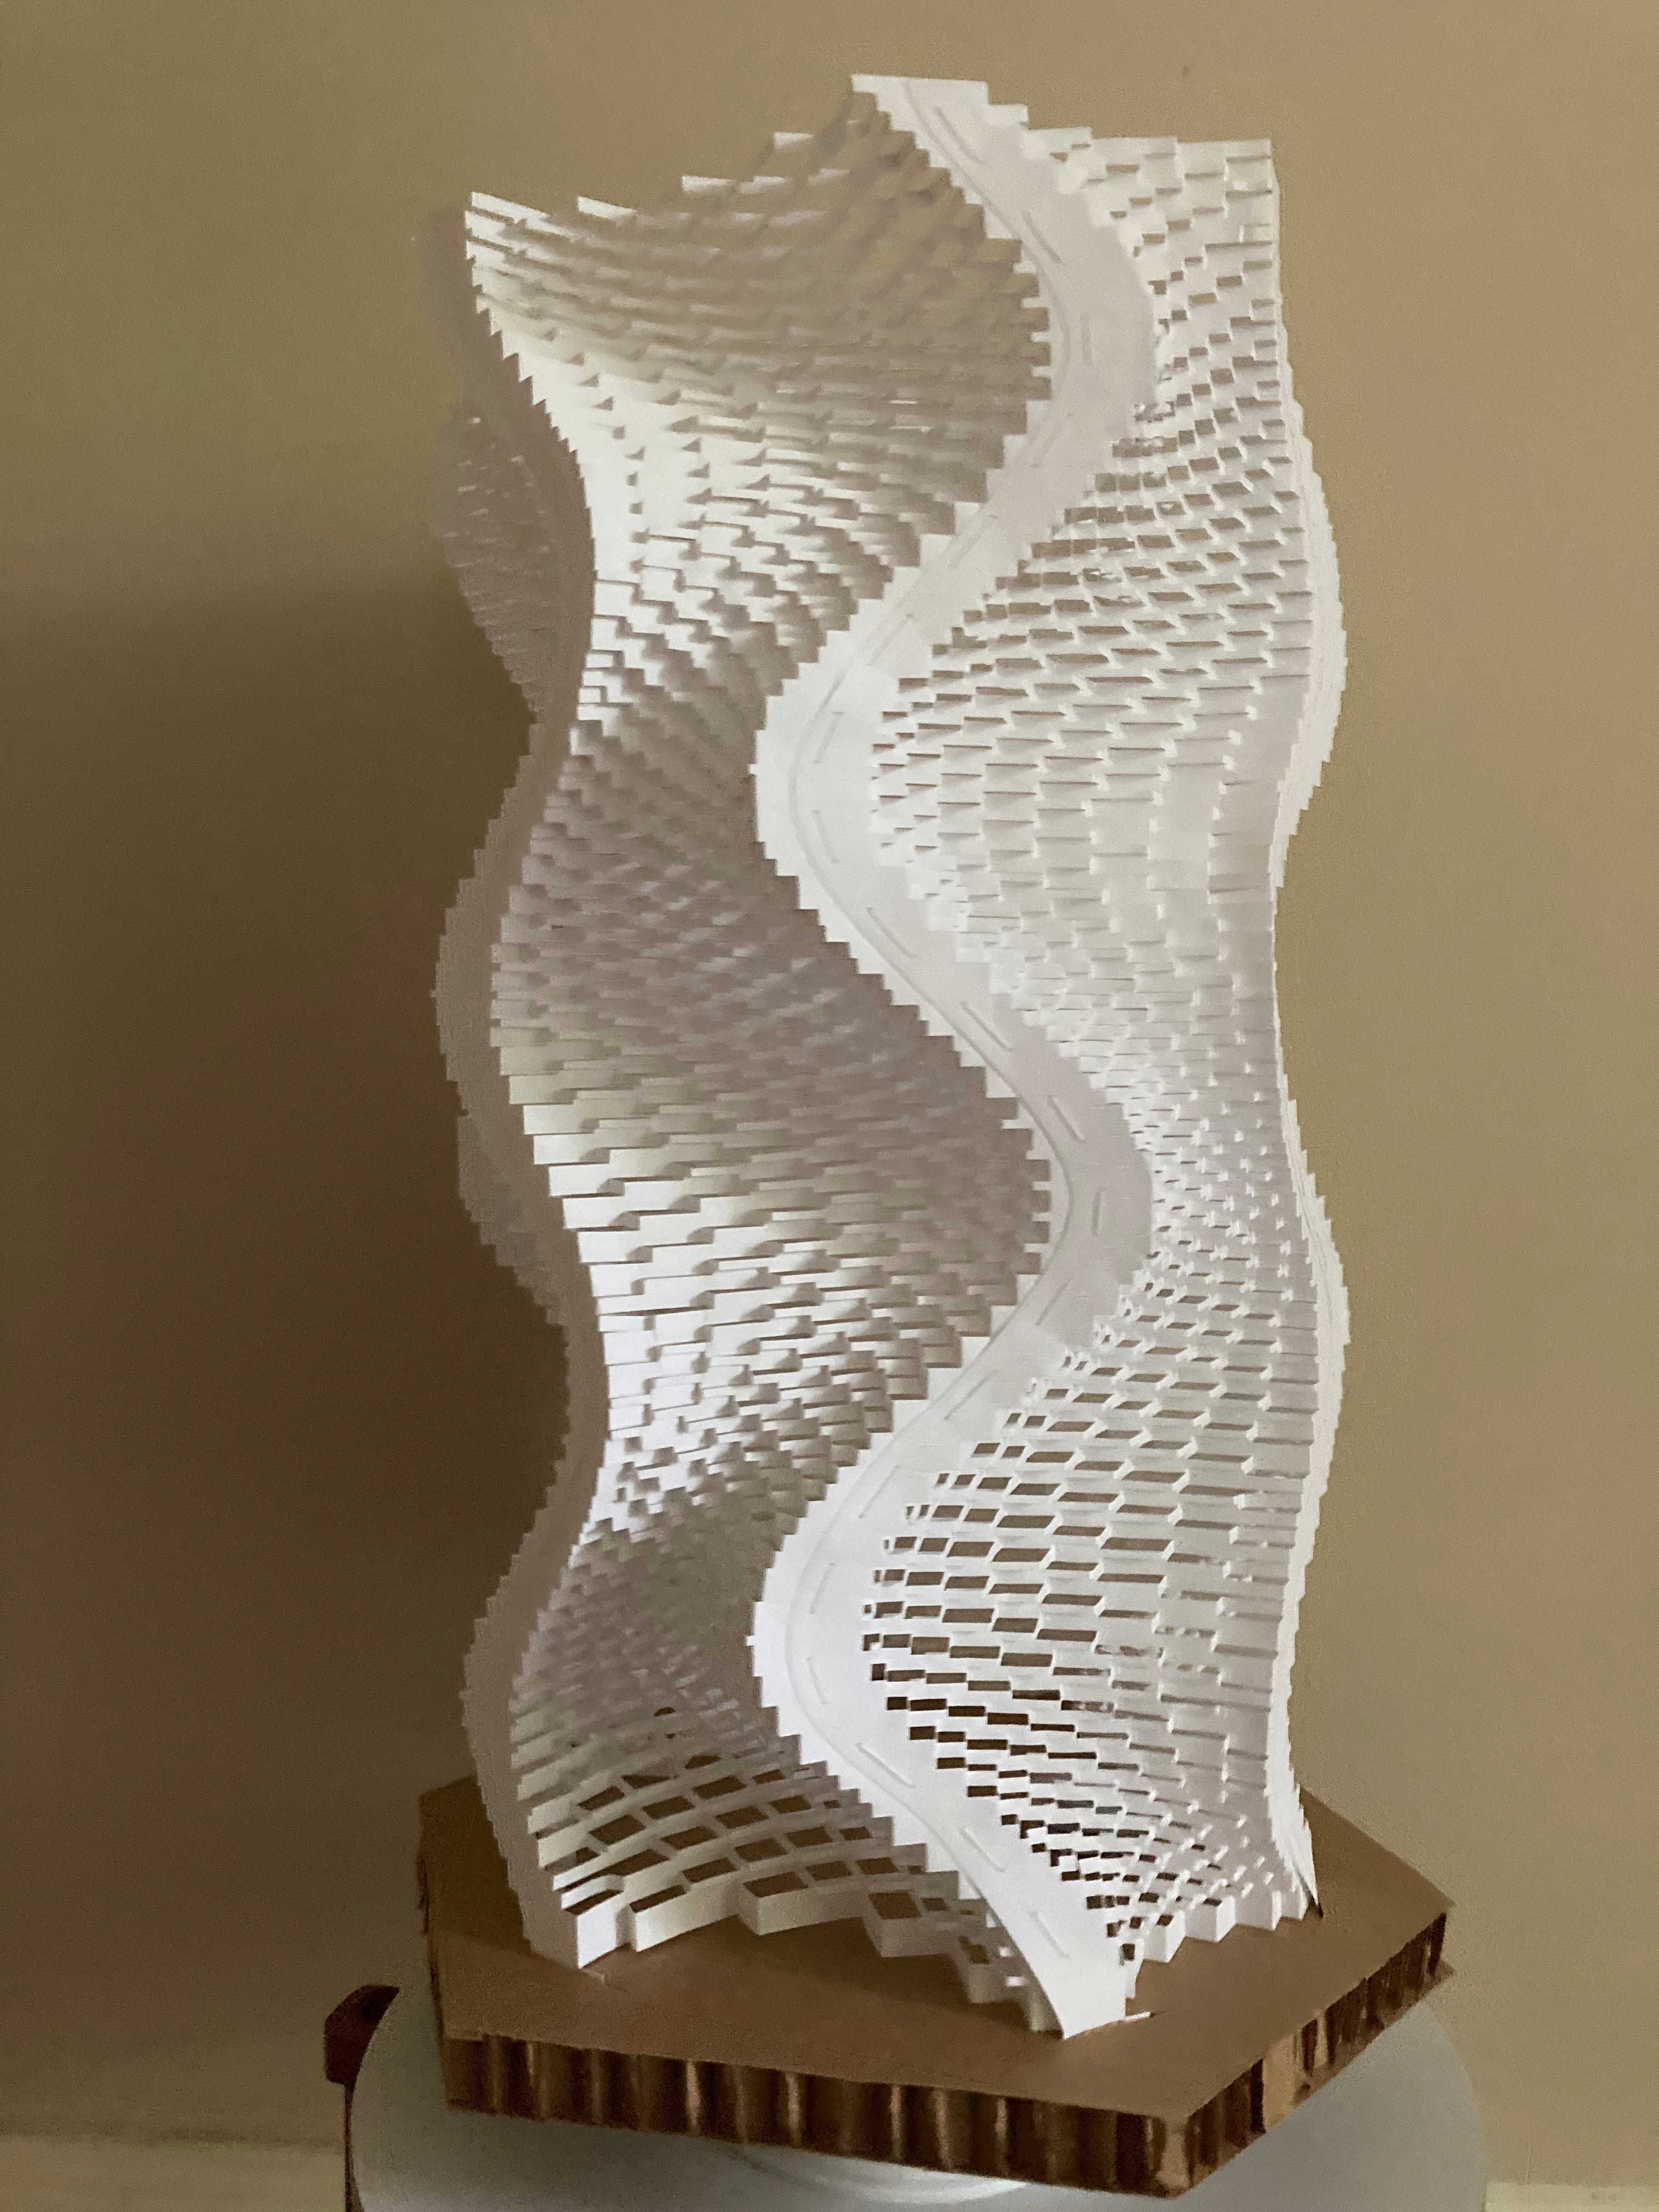
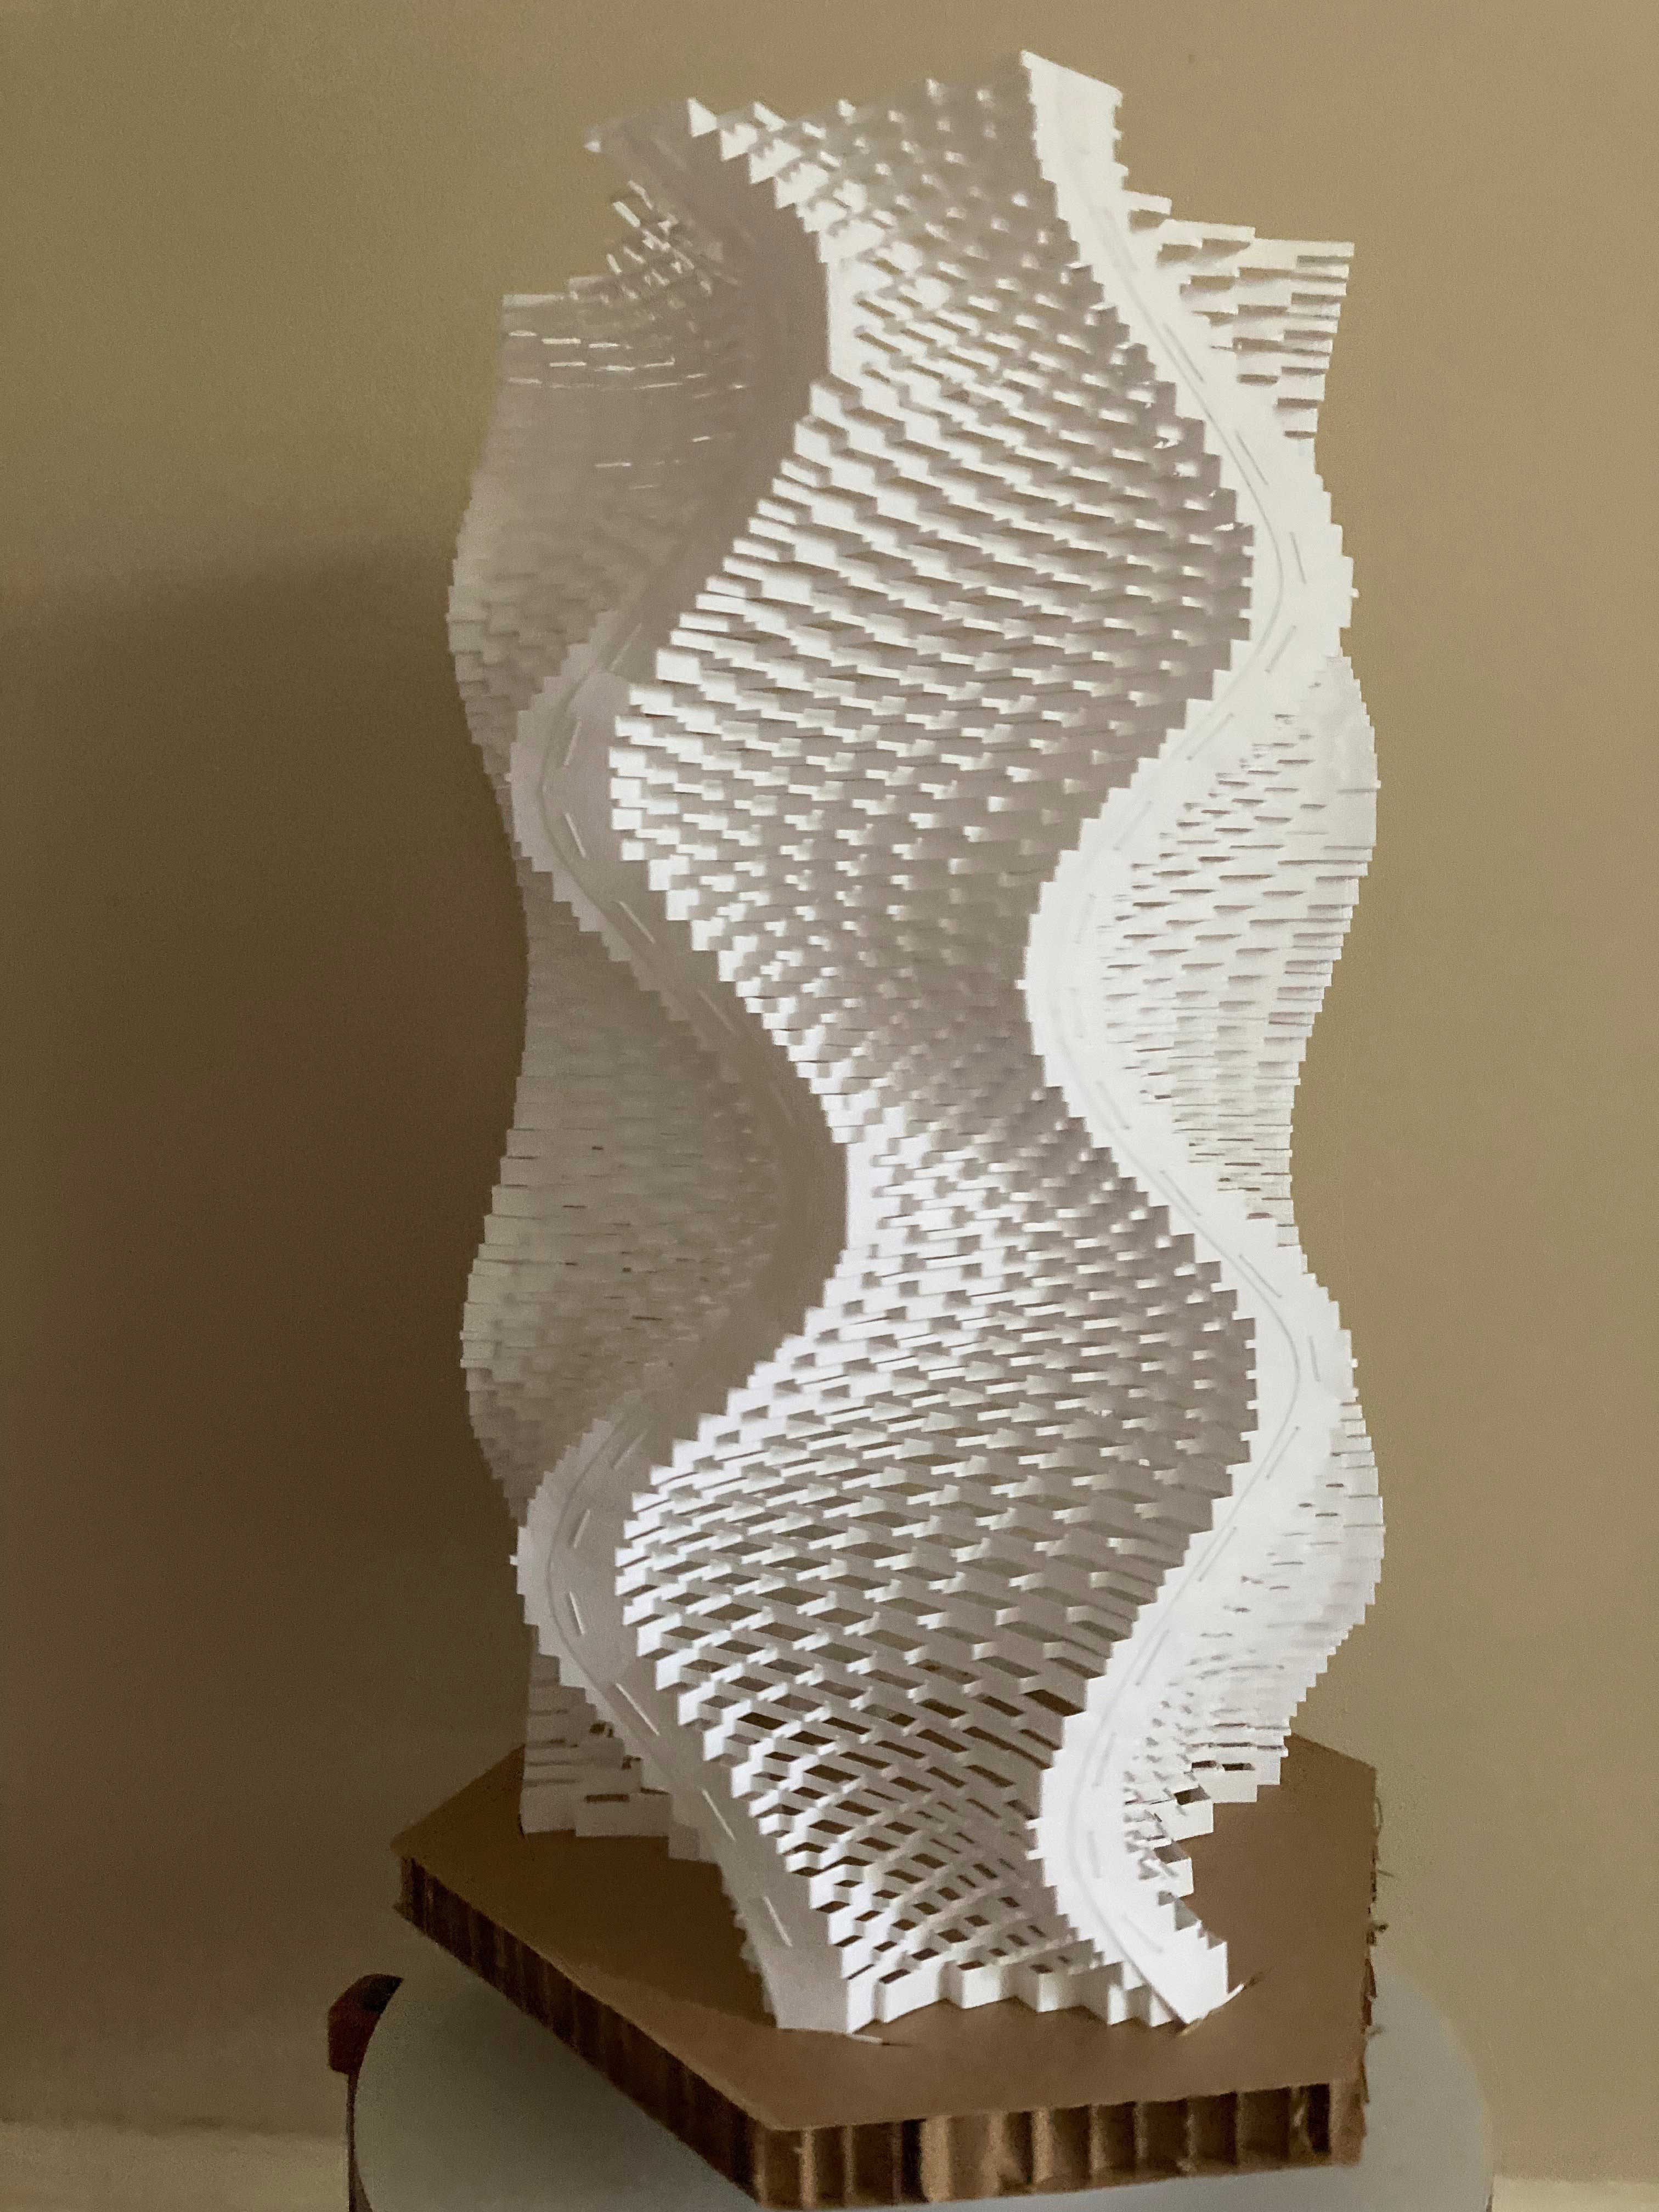
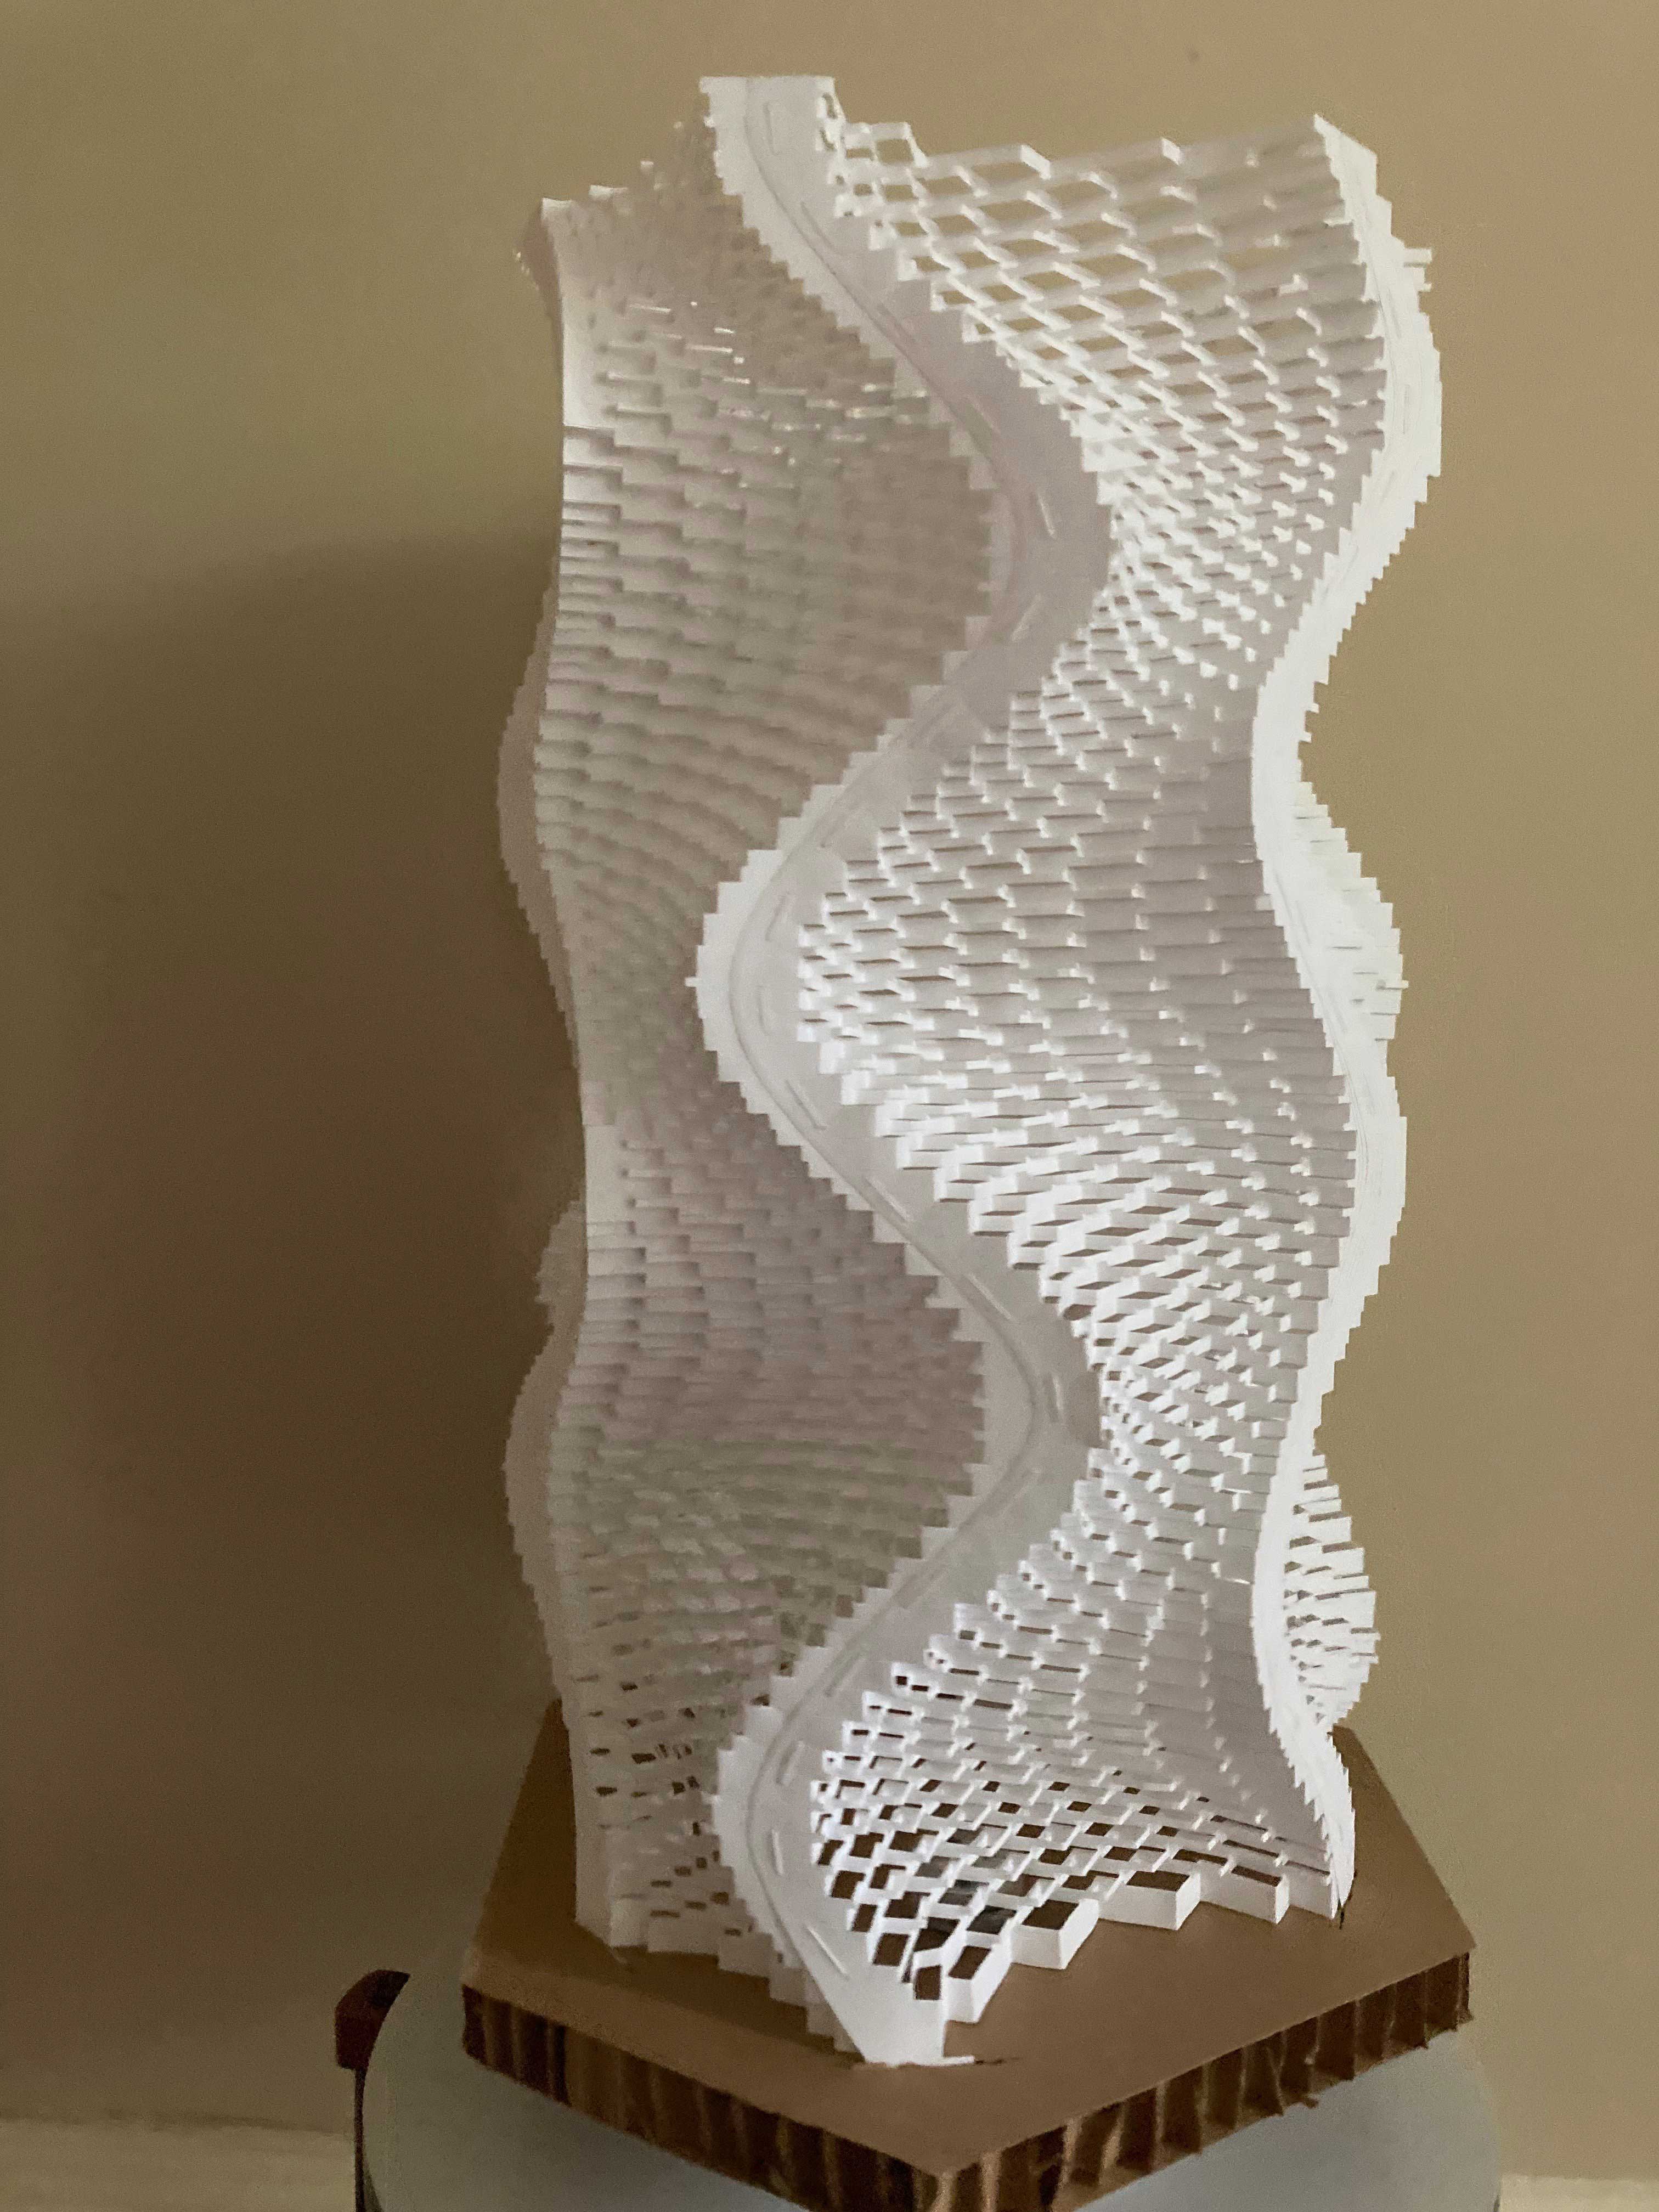
...and here it is rotating, because it is curvy, but screens are flat.
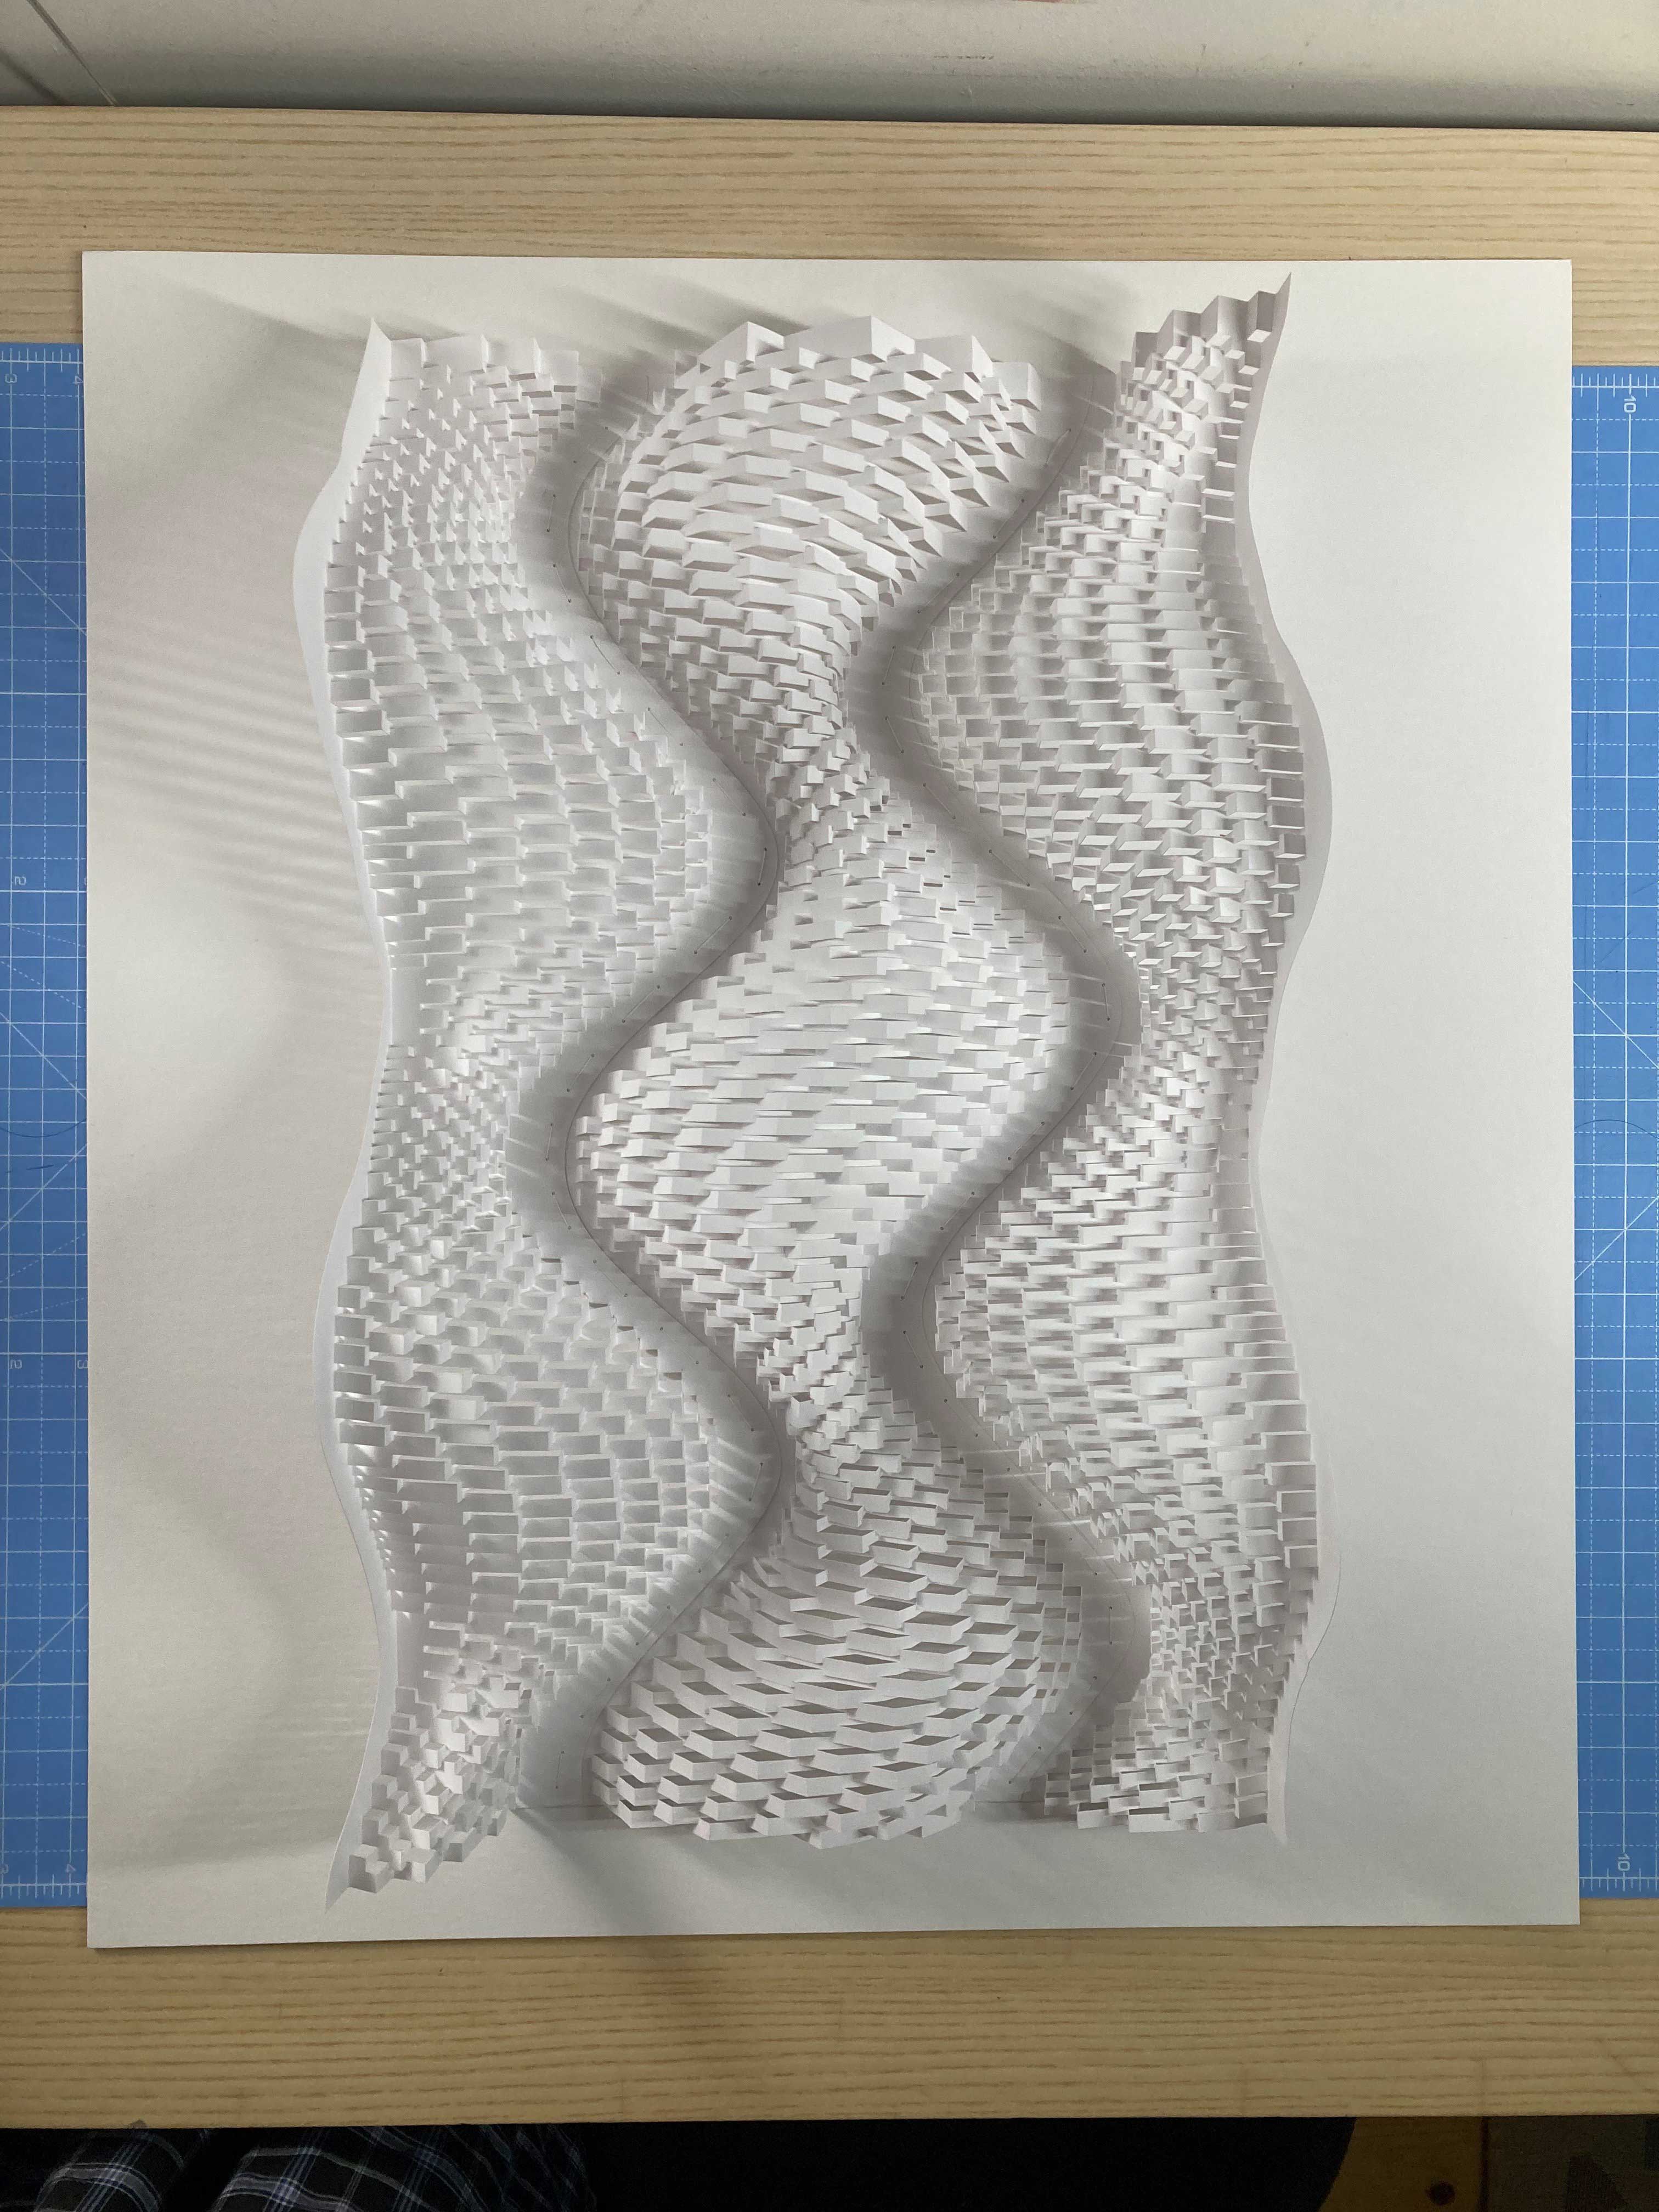
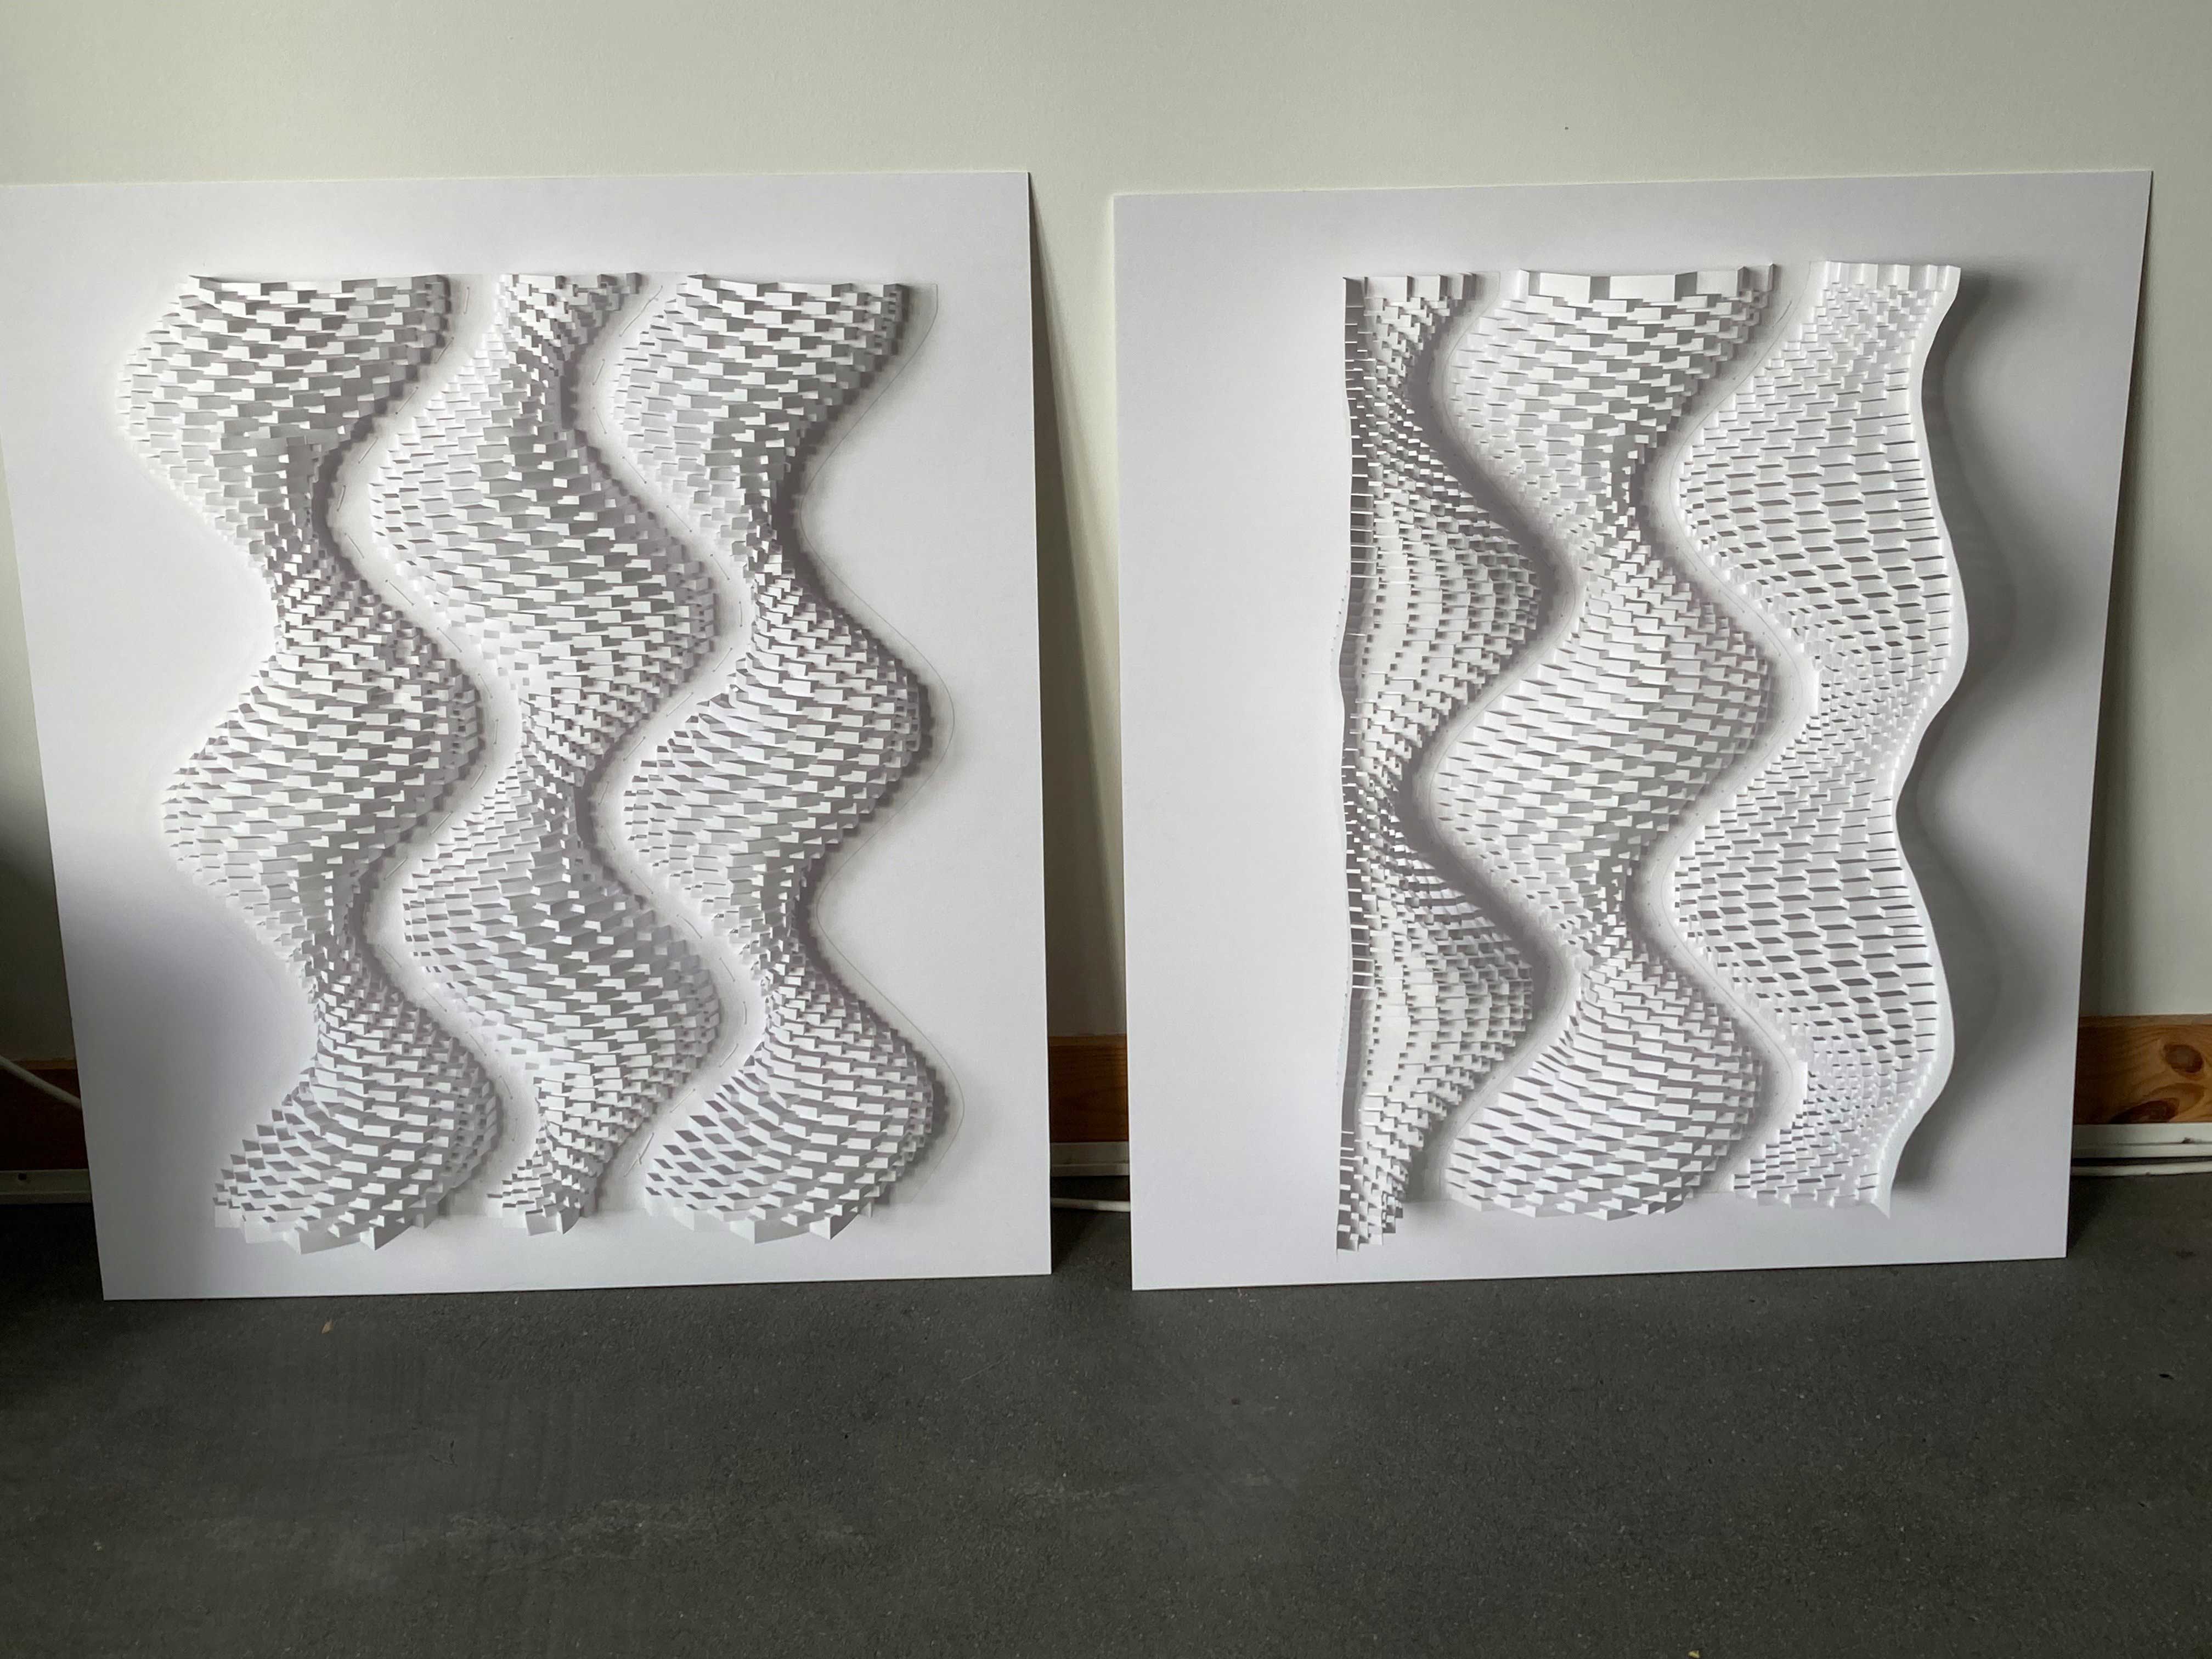
but wait, I still wanted to try one mounted flat. To mount all 6-pieces, I'd need a mounting board size A0. And I don't have that. I have A1, though, which is big enough to hold 3 pieces. All 6 or bigger would be cool, but this is better than nothing.
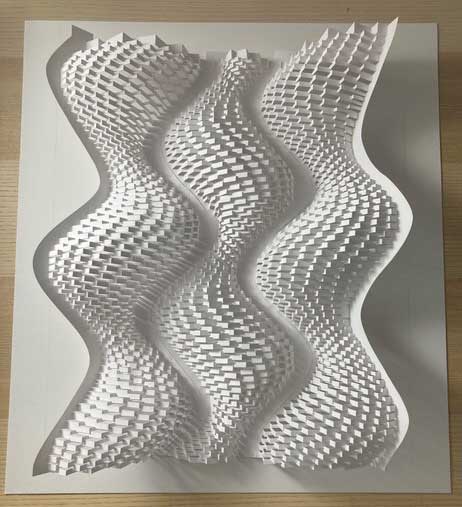
looking good. Since I was folding new paper for this version anyway, I left off the holes on the outer edges because I'm not planning on connecting them to anything. Even before it's stuck to the board, it looks very landscapey.
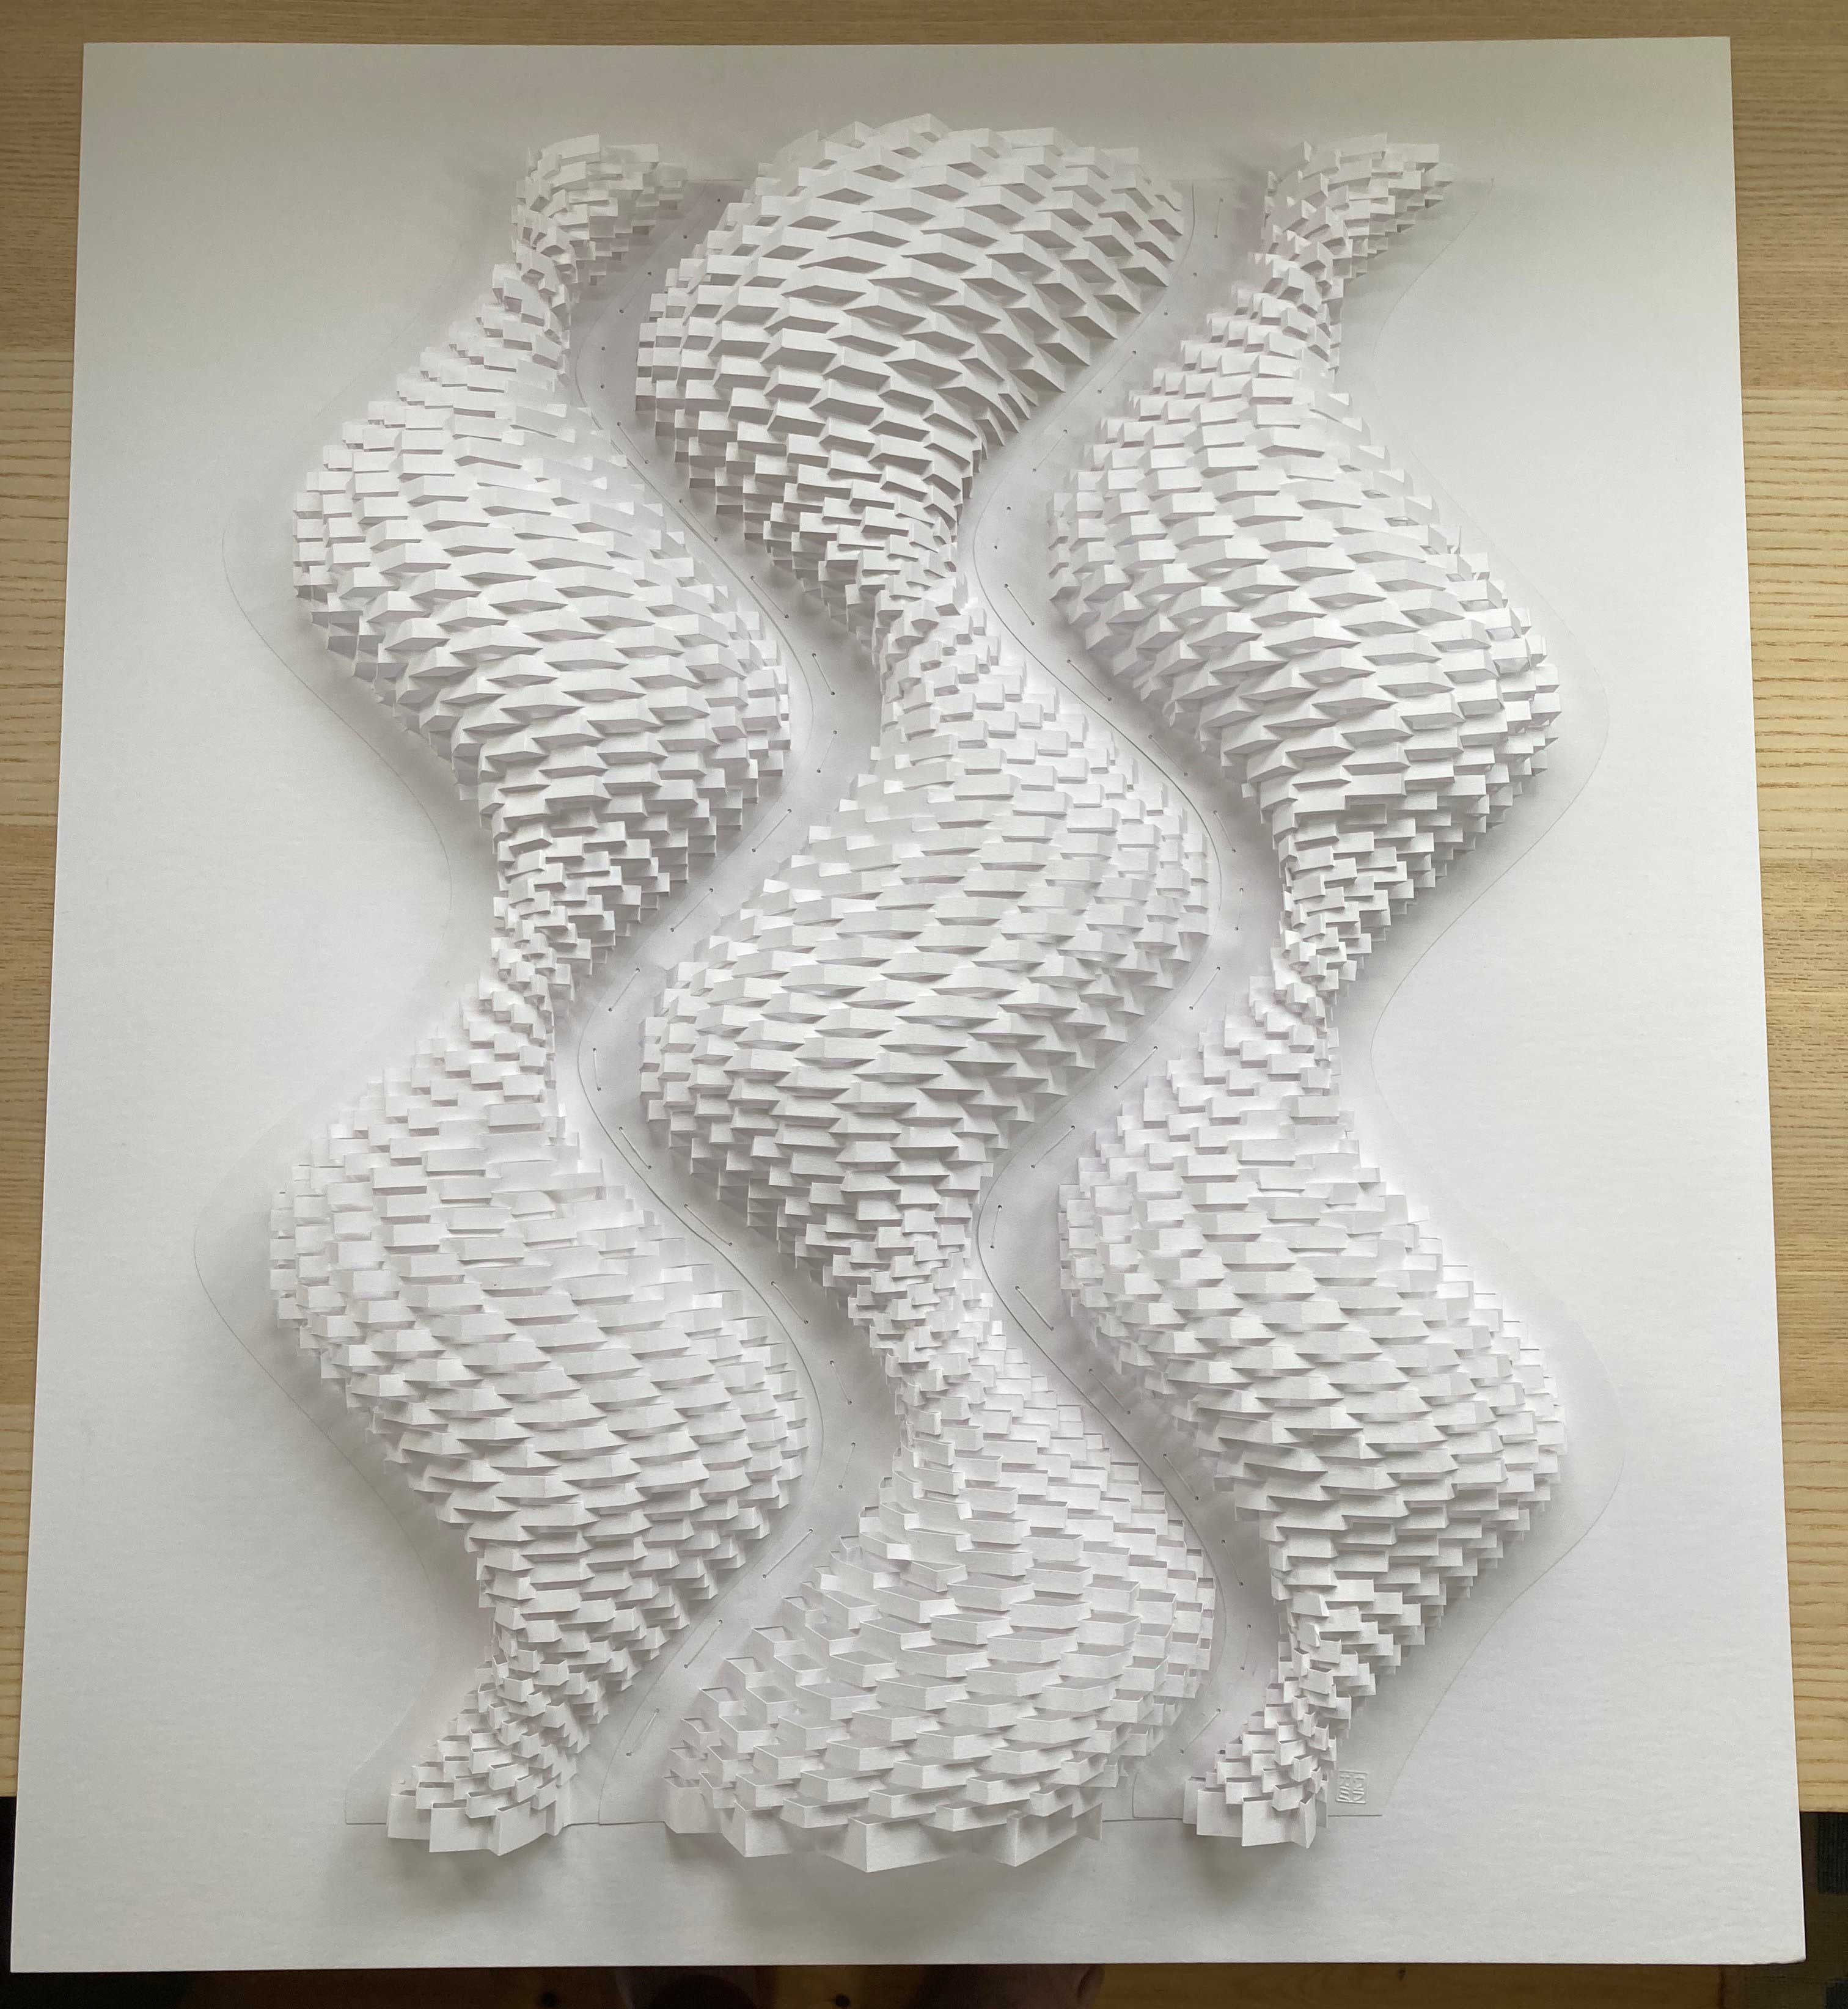
before I glue down the outer edges, a brief flyover. In fact, I kind of like it as-is. note to self: make another one like this later and don't finish mounting it, letting the 'wings' hang free.
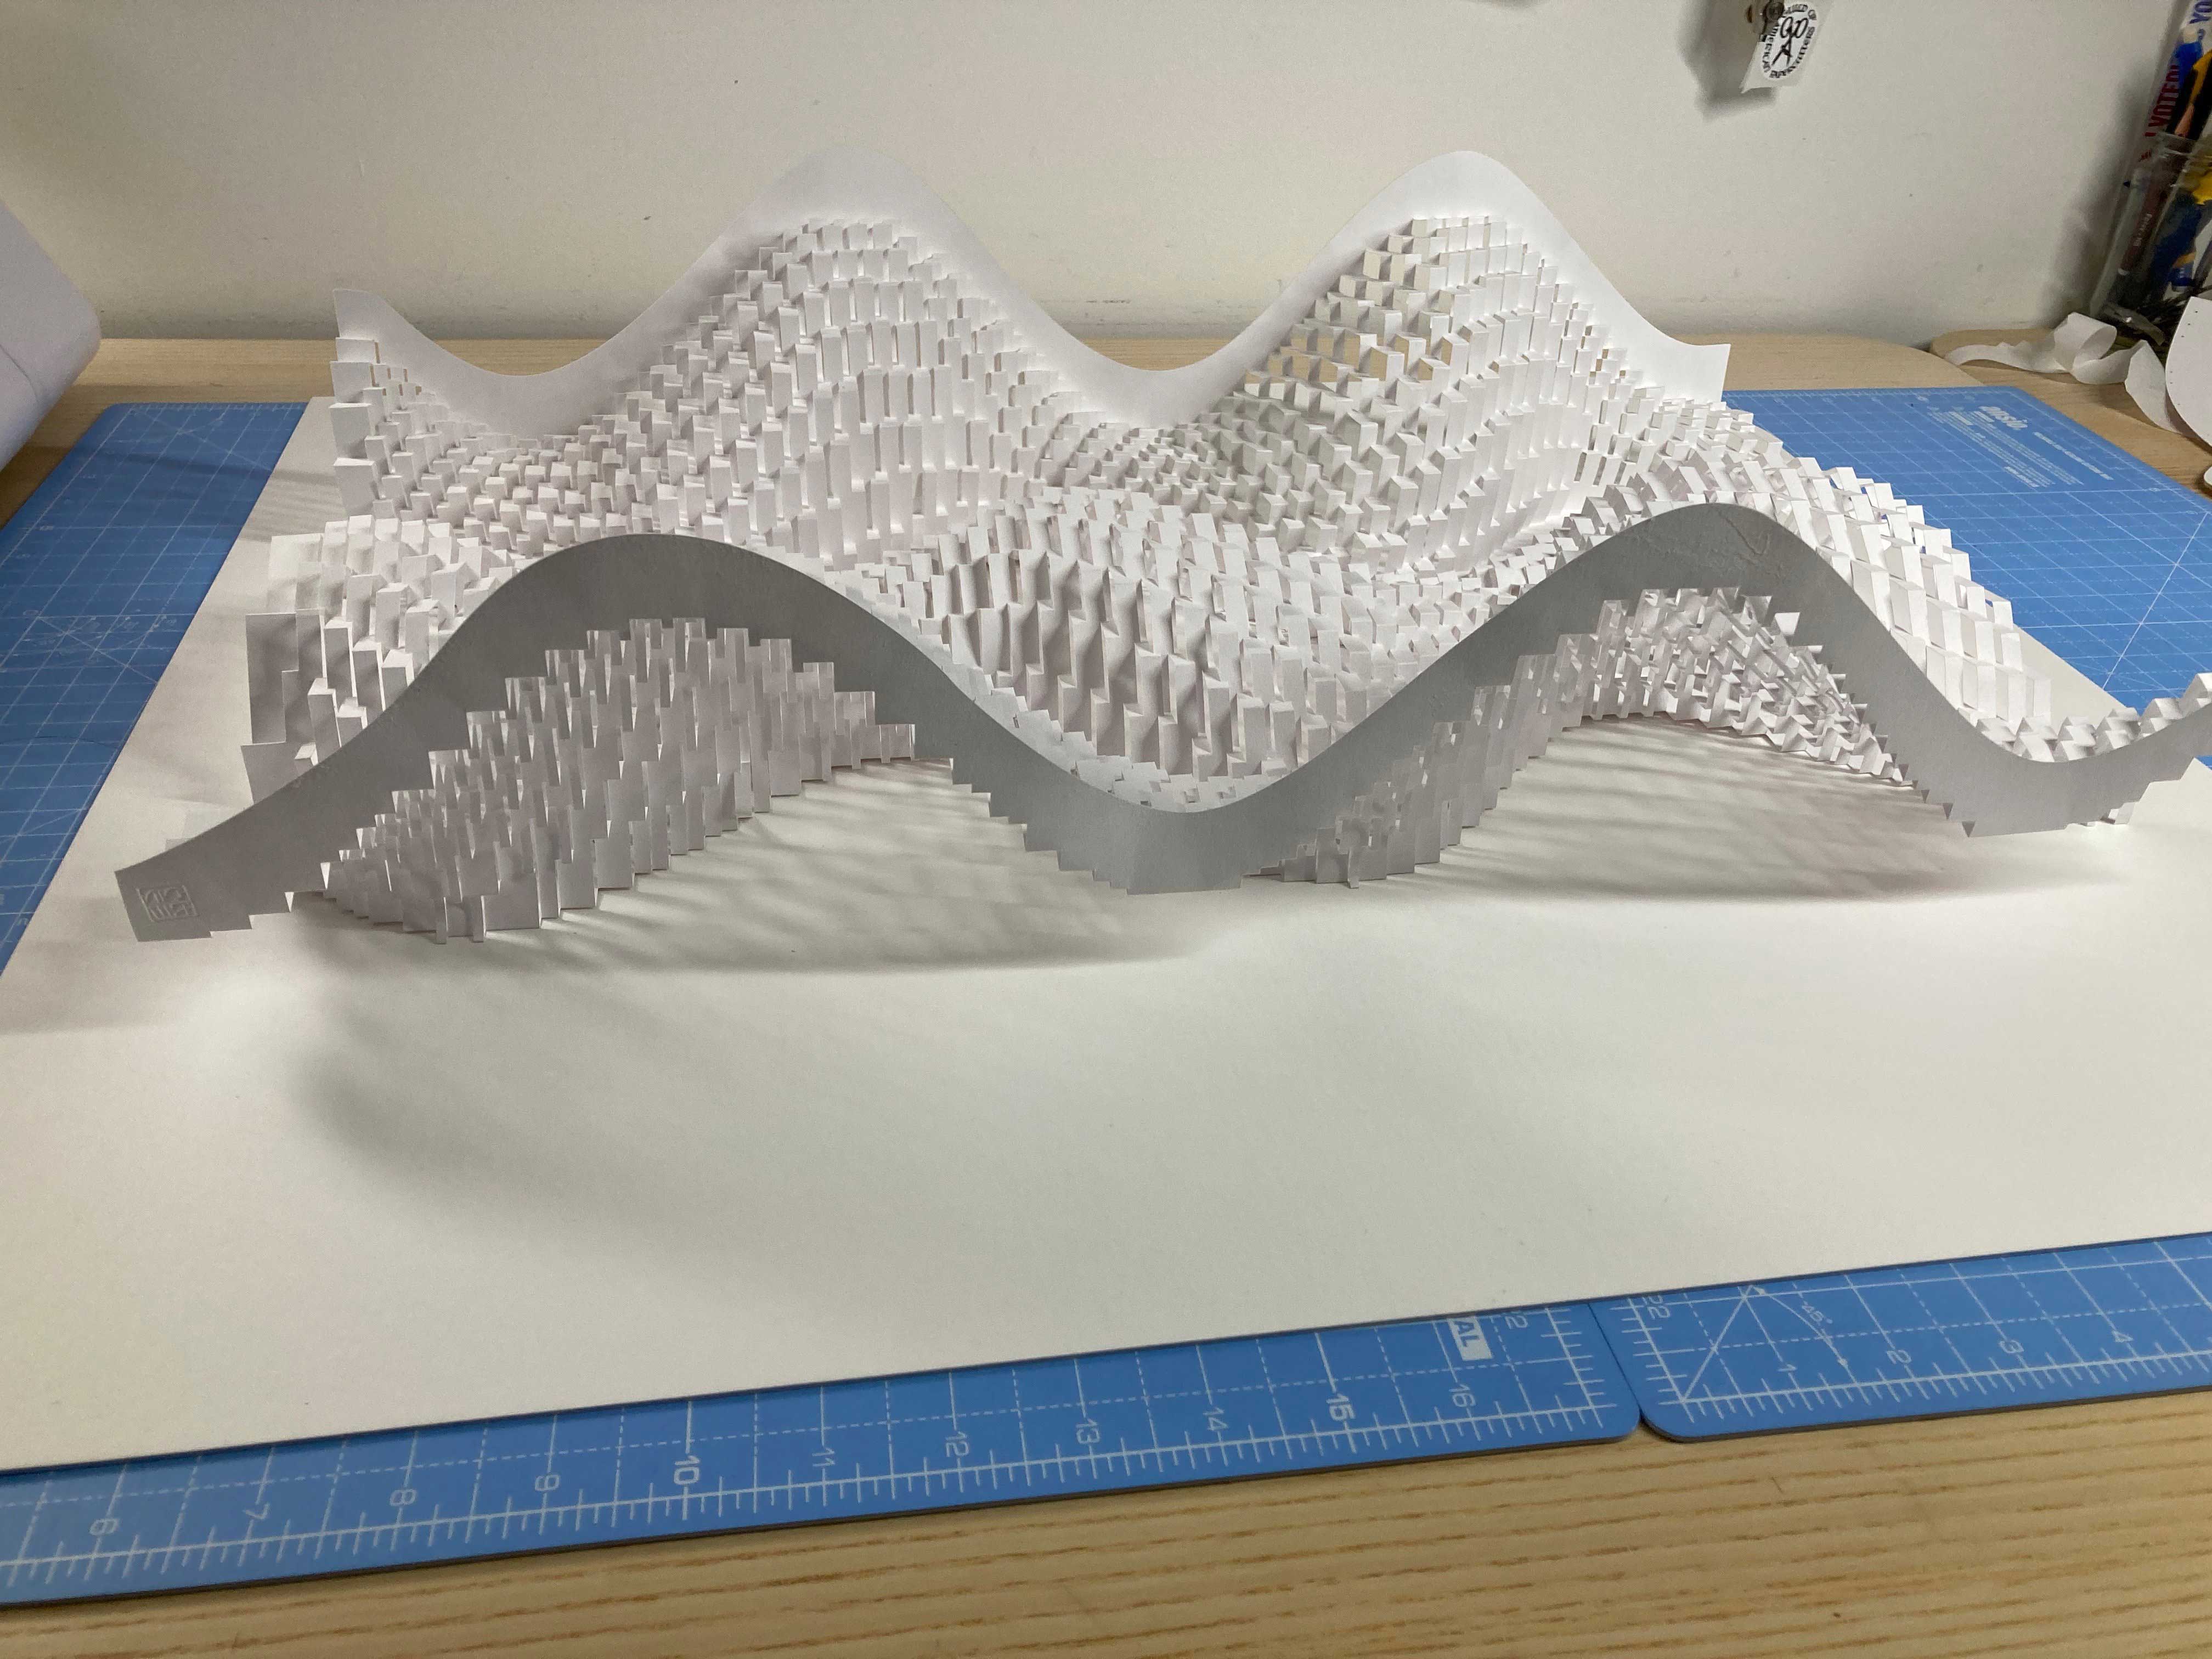
...and finally, finshed and fully mounted...
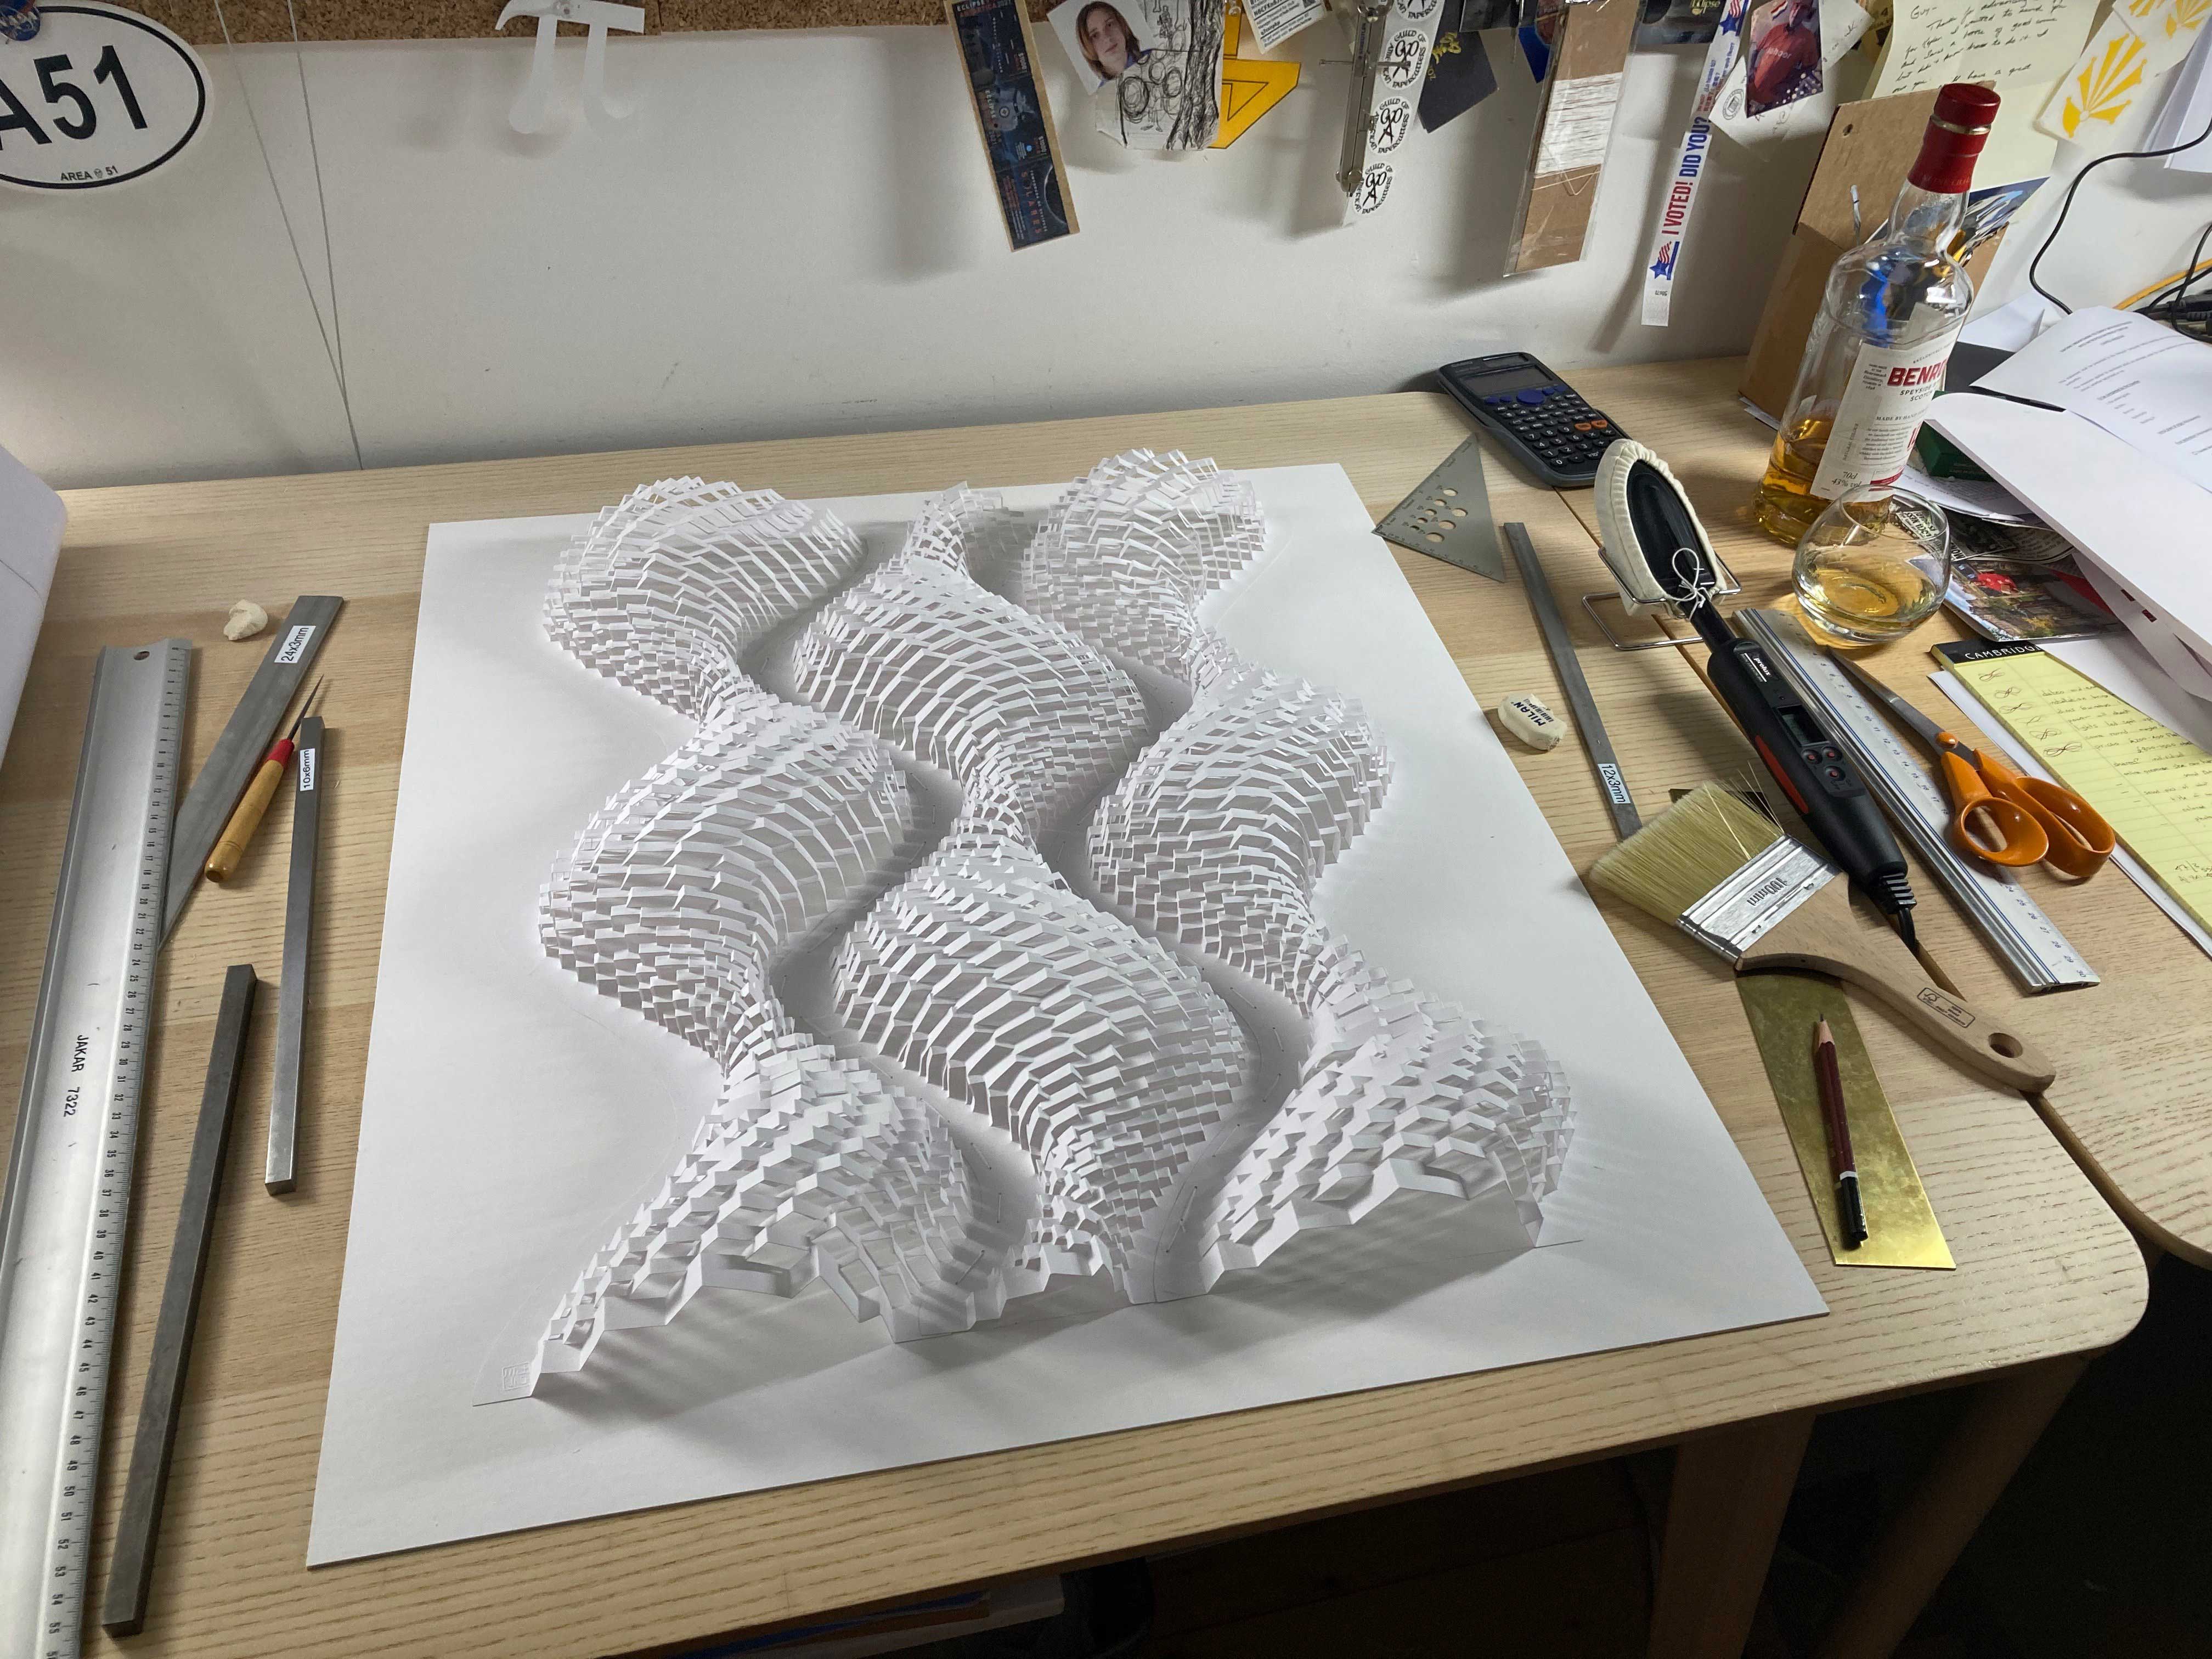
I definitely want to make one of these sometime with a much bigger board and 6 pieces; I think that would be excellent... but using what I've got, I cut and folded three more sheets of paper, and did the same thing but with free-hanging outer edges. I also reversed the yin-yanginess, to see how it looks.
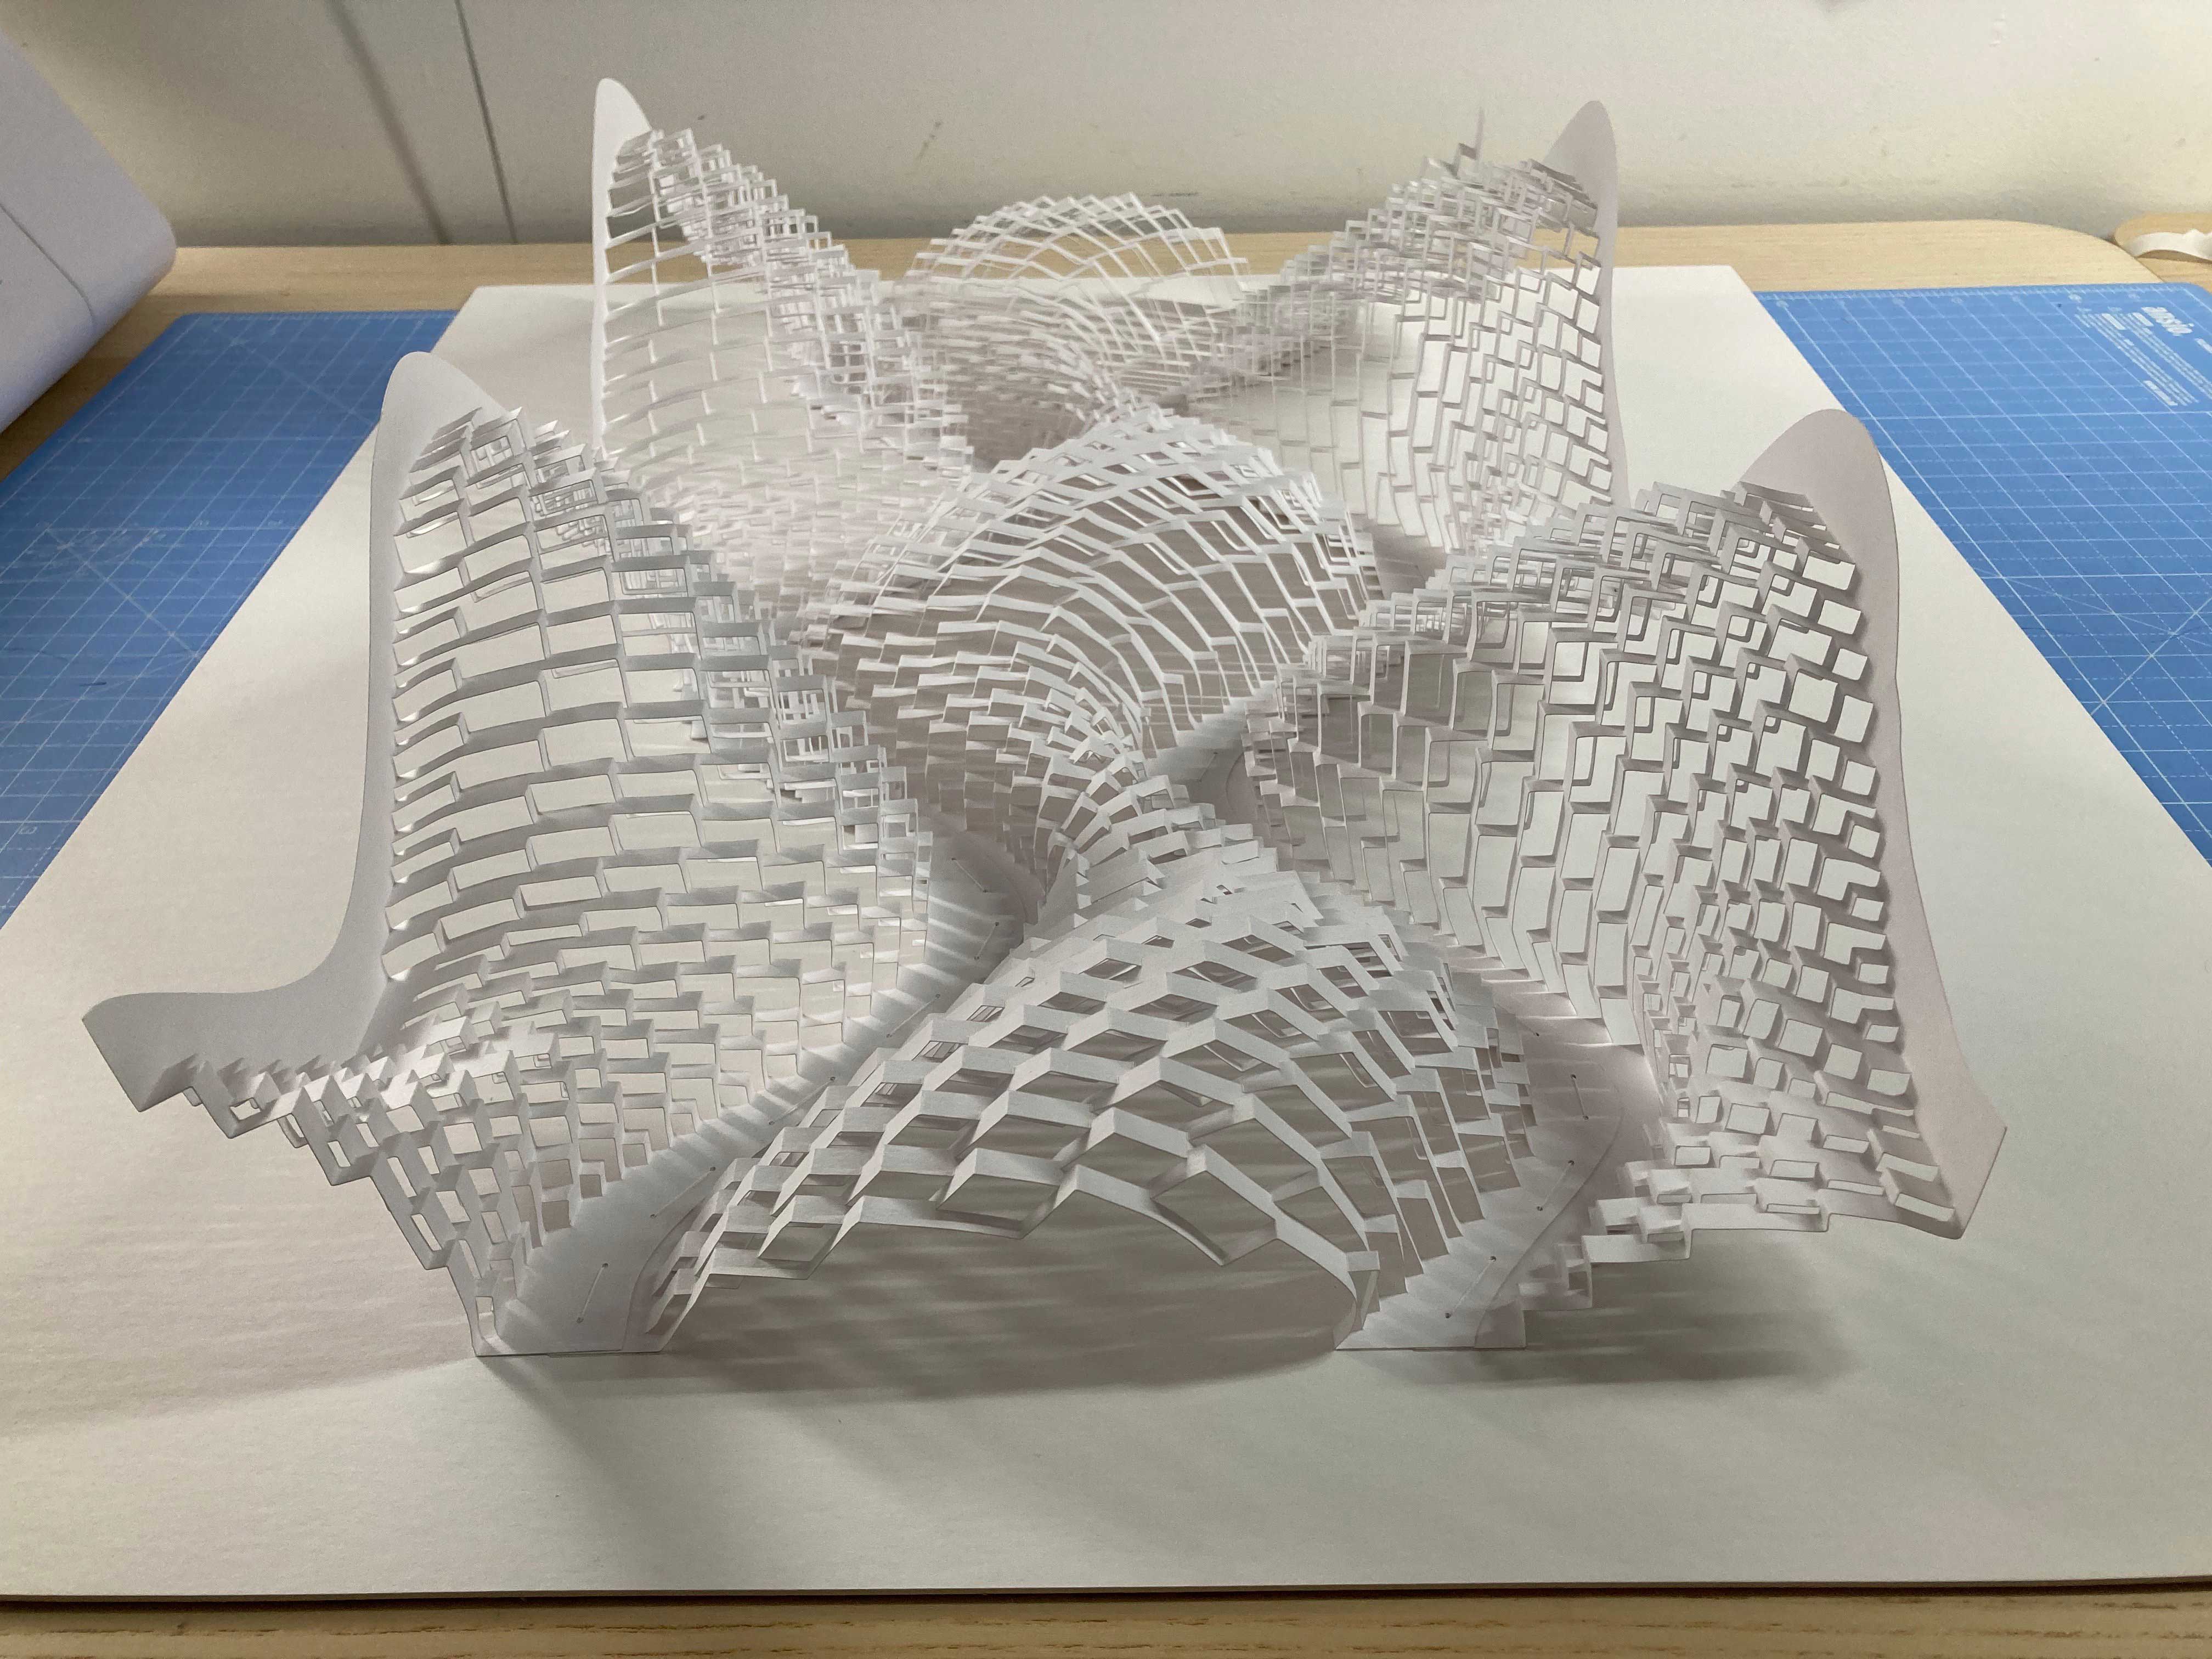
not only does this create a nice relief form, but by looking at it from different angles, you can also see some of the underside, which is often hidden in these pieces
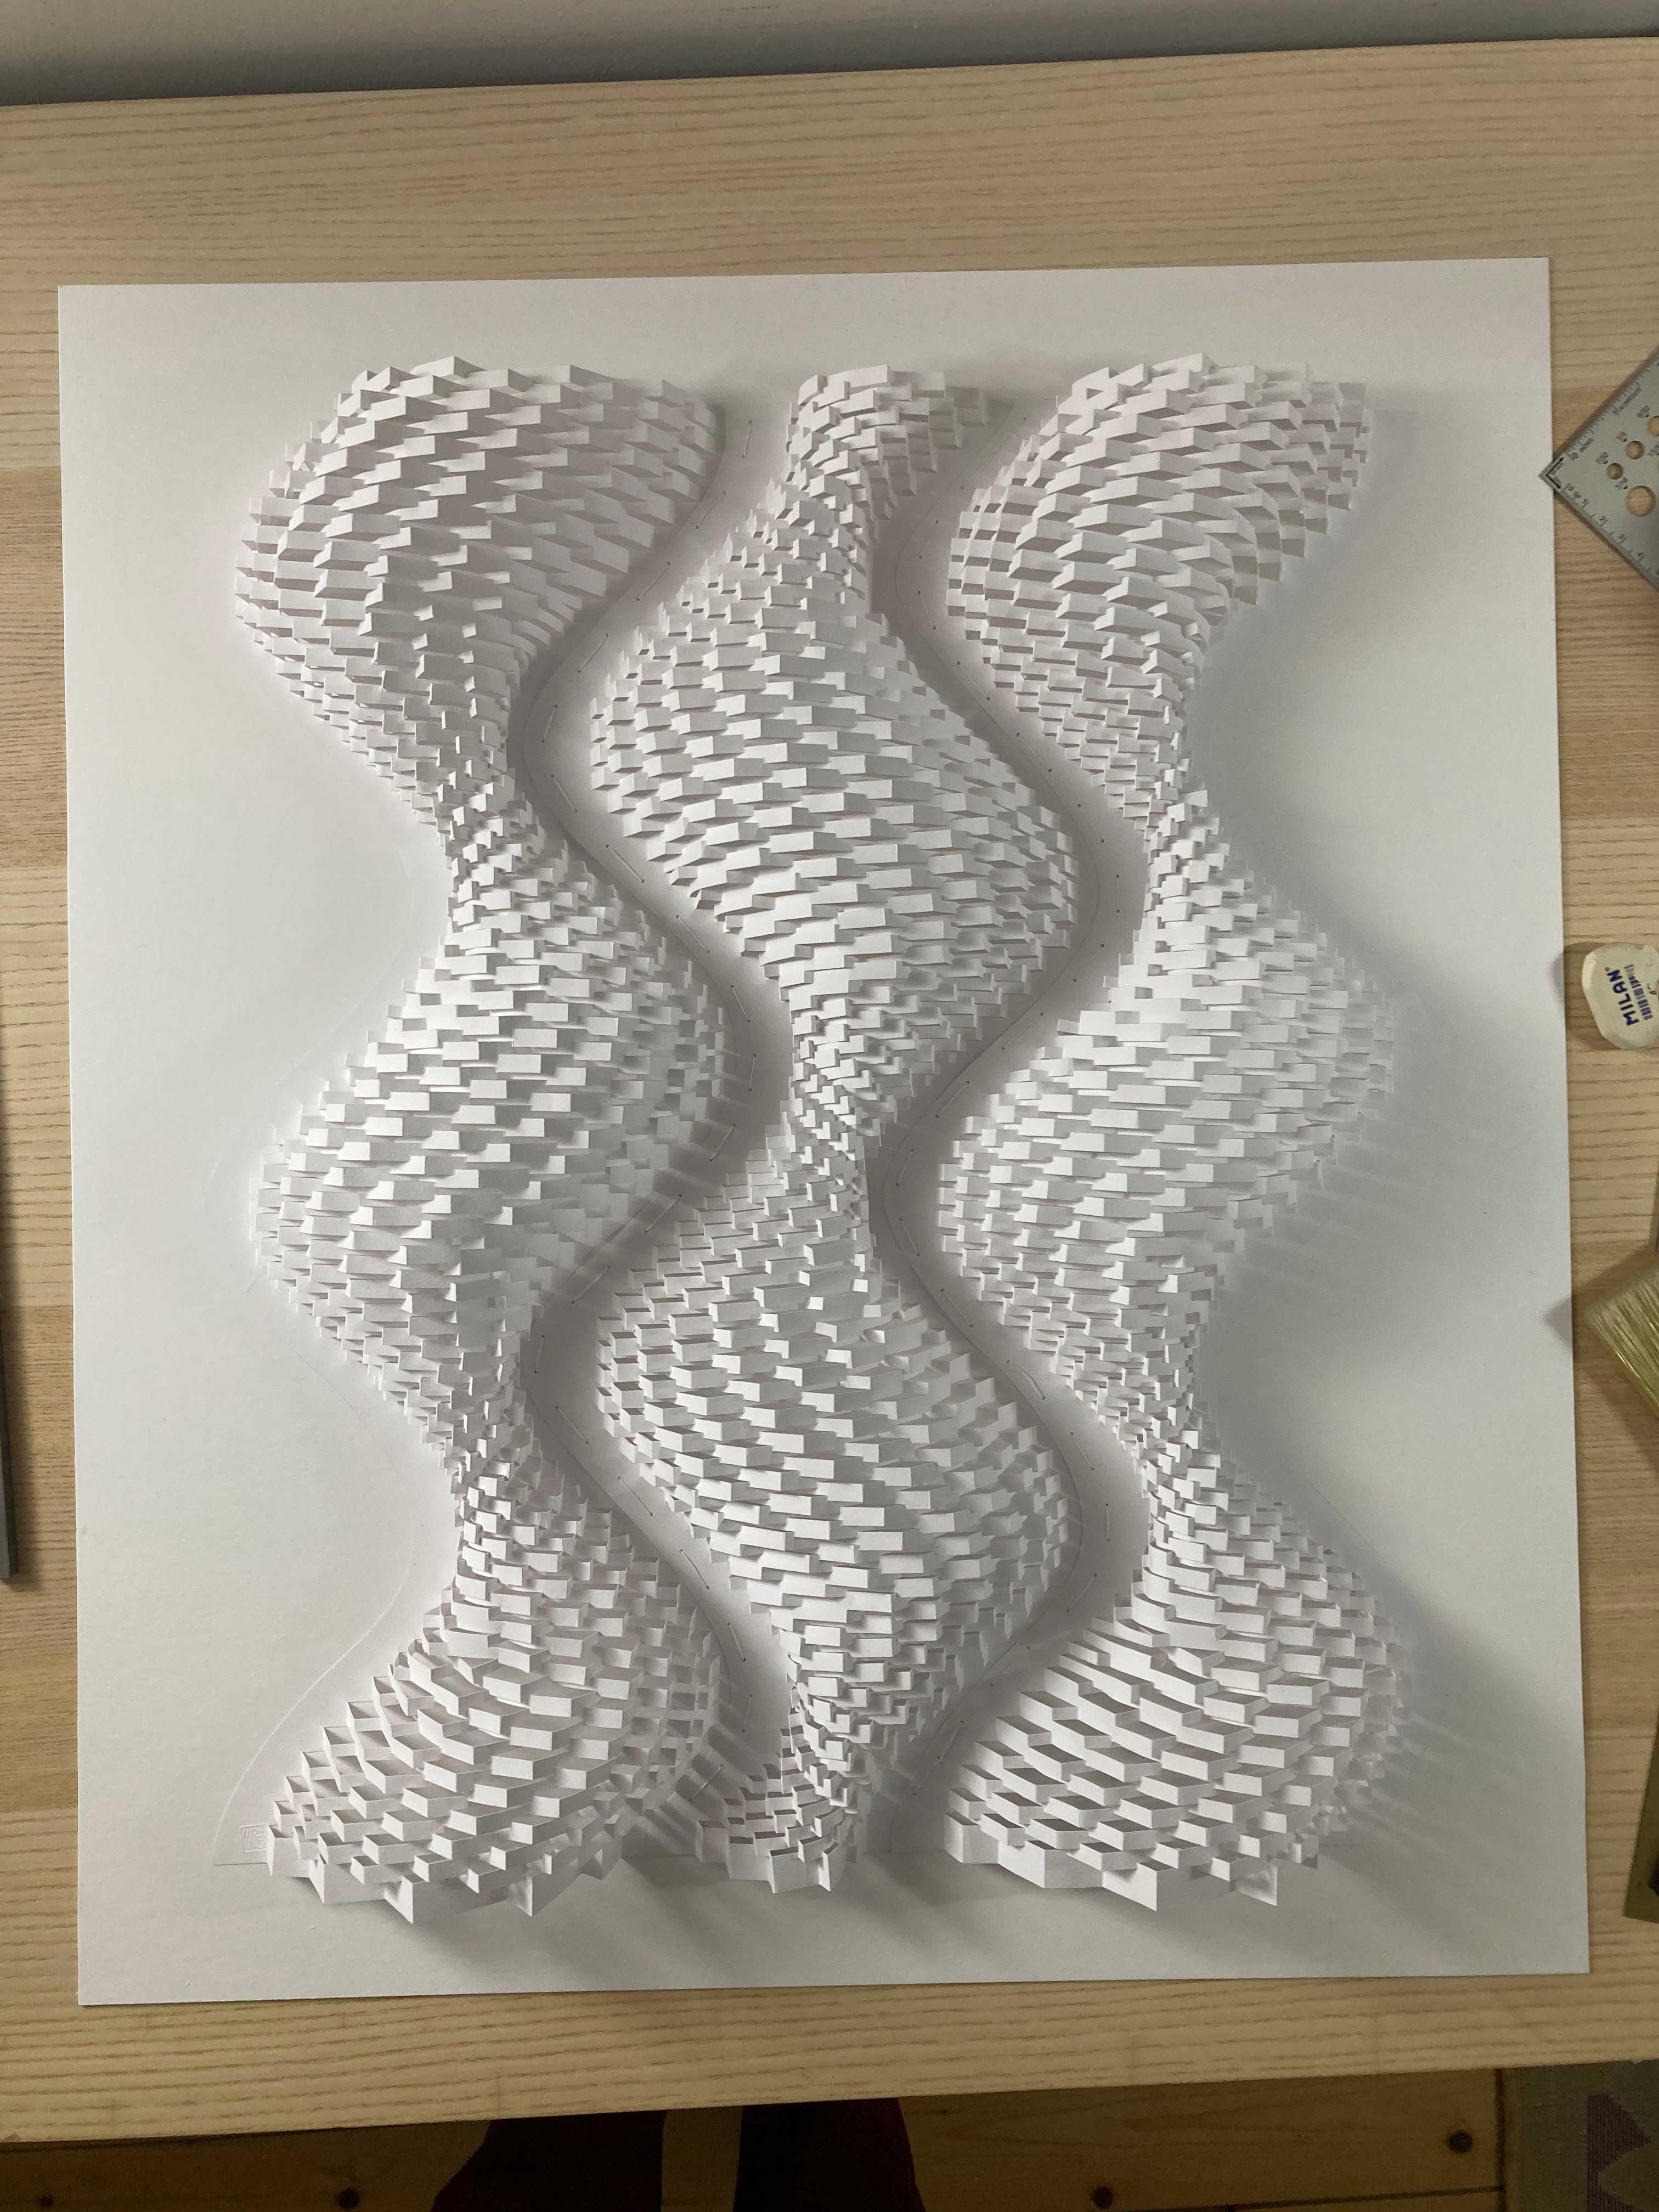
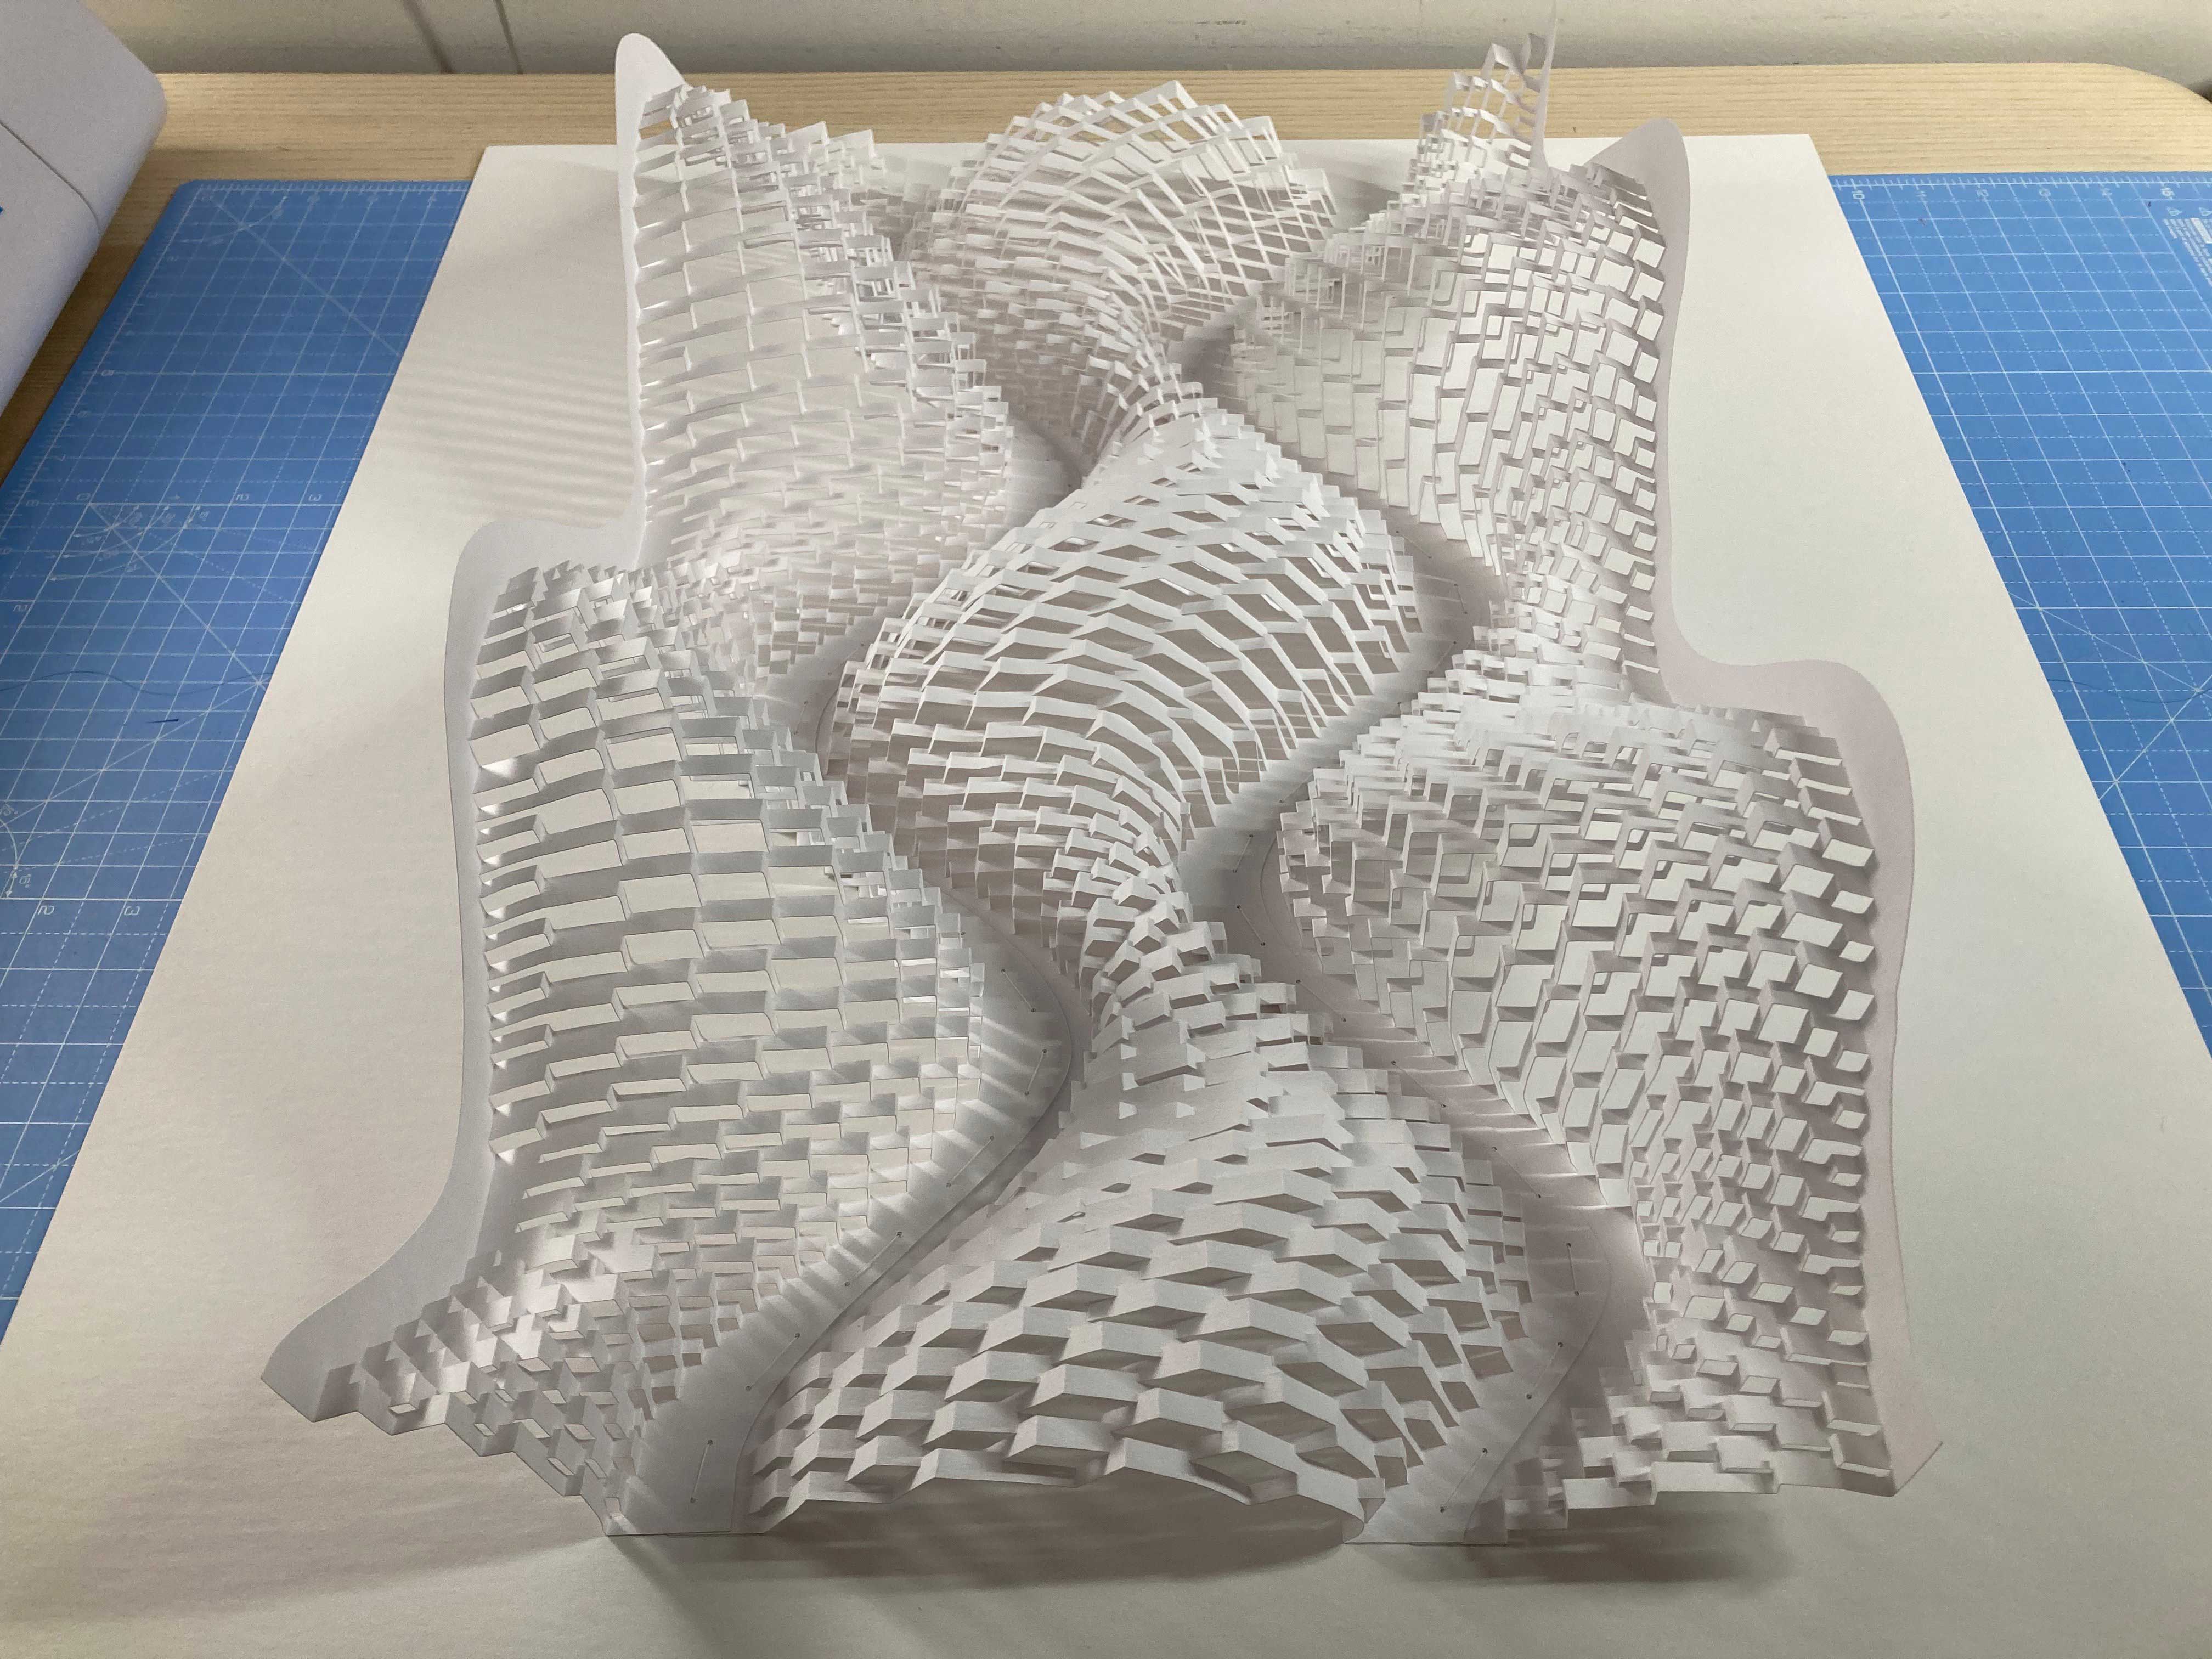
... but in the end and side-by-side, I still like it better with the edges tacked down. Live and learn...
And so I went back and glued the edges down. It does look better, I think.
So that's my process thread. 12 sheets of paper to make one big obelisk and two flat-mounted pieces. Paper is so much fun... and thanks for reading!